
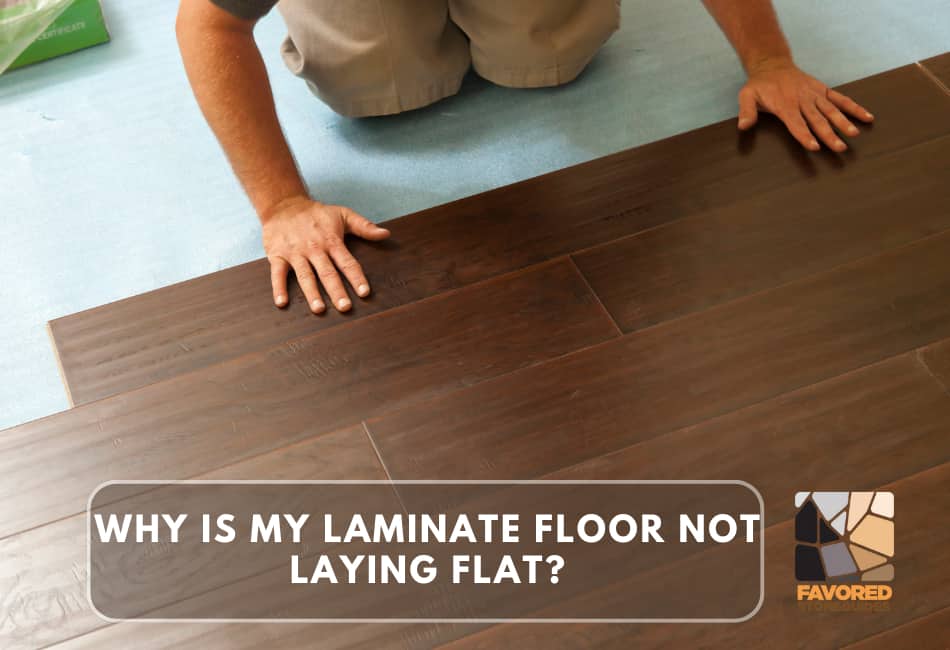
Laminate flooring has long been a popular choice amongst homeowners due to its affordability, durability, and wide array of styles.
It’s an excellent option for those seeking the appeal of hardwood or stone without the high cost or maintenance challenges.
However, the charm and longevity of laminate flooring heavily rely on it laying flat and even. Uneven, bulging, or buckling laminate flooring can not only disrupt the aesthetic appeal of your home.
Still, it can also lead to long-term issues like tripping hazards and shortened flooring lifespan.
This guide will delve into 13 common reasons your laminate flooring may not be flat. Understanding these issues can equip you with the knowledge to prevent them from happening or at least address them promptly when they do occur. Let’s begin.
Common Causes For Laminate Flooring Is Not Laying Flat
1. Uneven Subfloor
An uneven subfloor is a common culprit behind laminate flooring not laying flat. The subfloor is the foundational flooring structure upon which the laminate is installed.
If it’s uneven, the laminate flooring will mirror these imperfections, leading to an uneven surface, buckling, or even gaps between the planks.
Using Self-leveling Compounds or Shims
To fix an uneven subfloor, you can use a self-leveling compound or shims, depending on the severity of the unevenness.
- Self-Leveling Compound: A self-leveling compound is a quick-setting cement that automatically levels out when poured onto a surface. It’s perfect for minor unevenness.
- Before applying, ensure your subfloor is clean, dry, and grease-free.
- Apply the compound according to the manufacturer’s instructions, then wait for it to dry completely before installing your laminate flooring.
- Shims: Shims can be used if the unevenness is significant and you’re dealing with dips or humps.
- Shims are thin wedges of material that can be inserted under the subfloor to bring it to level.
- They’re often used in conjunction with a self-leveling compound. After placing the shims, you would apply the self-leveling compound to create a smooth, flat surface.
Handling these operations cautiously or hiring a professional if you’re uncomfortable doing it yourself is crucial.
2. Moisture Problems
Moisture issues can also cause laminate flooring not to lay flat. When exposed to moisture, laminate planks can swell and warp, causing buckling and unevenness.
This issue is particularly prevalent in areas of high humidity or prone to water leaks, such as kitchens, bathrooms, and basements.
Moisture-related Issues
When laminate flooring absorbs moisture, it expands. This expansion can lead to several problems, such as cupping, where the edges of the planks rise higher than the center, or crowning, where the center of the plank rises above the edges.
Furthermore, excessive moisture can lead to mold and mildew growth beneath your laminate flooring, which poses health risks and can damage your subfloor over time.
Dry Subfloor and Using Moisture Barriers
Before installing laminate flooring, it’s essential to ensure that your subfloor is thoroughly dry.
If installing over a concrete subfloor, waiting at least 60 days after the concrete has been poured is recommended to allow any residual moisture to evaporate.
Use a moisture meter to check the wood’s moisture content for a wooden subfloor. As a rule, the moisture content should be less than 12%.
To protect your laminate flooring from moisture, consider using a moisture barrier. A thin plastic or felt layer installed directly onto the subfloor before the laminate is a moisture barrier.
This barrier can prevent moisture from seeping up from the subfloor and causing damage to your laminate.
Be sure to overlap the seams of the moisture barrier by at least 8 inches to ensure full coverage.
Remember, moisture issues can be complex, so if you’re unsure about the moisture level in your home or how to install a moisture barrier correctly, it might be best to consult a professional.
3. Poor Acclimatization
Another aspect to take into account when installing laminate flooring is acclimatization. This process is essential to prevent future complications with your flooring, such as warping or gaps between boards.
Acclimatization allows the laminate flooring to adjust to the environment in which it will be installed.
It adjusts to the temperature and humidity levels of the room, reducing the risk of expansion or contraction post-installation that can lead to undesirable flooring issues.
Skipping this step can result in poor fitting, space between the planks, and an uneven floor.
Instructions for Proper Acclimatization
For proper acclimatization of laminate flooring, follow these steps:
- Upon delivery, leave the unopened boxes of laminate in the room where they will be installed for at least 48 to 72 hours. This allows the laminate to adjust to the room’s specific conditions.
- During this acclimatization period, try to maintain normal living conditions in the room. That means the temperature should be between 65 and 85 degrees Fahrenheit, and the relative humidity should be between 35 and 65 percent.
- Avoid stacking the boxes too tightly together. Leave some space between the boxes to allow air to circulate around them.
- After the acclimatization period, check the planks for warping or other issues before beginning the installation.
4. Subpar Underlayment
The underlayment is a critical component in a laminate flooring installation. It is pivotal in providing a stable, sound, and comfortable surface.
A subpar underlayment can lead to many problems, including an uneven floor and increased noise levels.
Moreover, it may not provide the necessary moisture barrier, thus making the flooring susceptible to damage over time.
Using Quality Underlayment
Quality underlayment is essential as it offers several key benefits. Firstly, it is a moisture barrier, protecting your laminate from potential water damage.
Secondly, it provides sound insulation, reducing the noise produced when walking on the floor.
Thirdly, a quality underlayment can help smooth out minor subfloor imperfections, ensuring a flat surface for the laminate installation.
Lastly, some underlayments have an attached vapor barrier, enhancing their protective quality.
Recommendations for Selecting the Right Underlayment
Choosing the right underlayment depends on various factors, such as the type of subfloor, the room’s moisture levels, and the level of sound insulation required.
Here are some recommendations:
- For a wooden subfloor, a standard foam underlayment can be sufficient.
- If you’re installing laminate in a moisture-prone area like a basement, consider an underlayment with a vapor barrier.
- For concrete subfloor combination underlayment that includes a moisture barrier., use a
- Consider using an acoustic underlayment for enhanced noise reduction, especially in multi-story buildings.
5. Improper Installation
An improper underlayment installation can undermine its benefits and lead to several complications, such as buckling, increased noise levels, and moisture damage.
Missteps like skipping underlayment, not allowing expansion gaps, or insufficient sealing seams can lead to these issues.
Common Installation Mistakes and Their Consequences
- Skipping Underlayment: This can result in an uneven floor, lack of sound insulation, and potential damage due to moisture.
- Not Allowing for Expansion Gaps: Laminate flooring expands and contracts with changes in temperature and humidity. Failure to leave enough room for this expansion can result in buckling.
- Not Sealing Seams Properly: Allowing moisture to seep through seams can damage both the underlayment and the laminate flooring.
Step-by-Step Guide to Correct Installation Techniques
- Measure the Room:
Accurately measure the square footage of your room to ensure you purchase enough underlayment.
- Lay Down the Underlayment:
Roll out the underlayment parallel to where you plan to install your laminate flooring. Be sure not to overlap edges.
- Trim Excess Underlayment:
Trim any excess underlayment that reaches beyond the room’s boundaries with a utility knife.
- Seal the Seams:
Use moisture-resistant adhesive tape to seal all seams and ensure a moisture-tight barrier.
- Proceed with Flooring Installation:
After ensuring a smooth, properly sealed underlayment, you can install your laminate flooring per the manufacturer’s instructions.
6. Insufficient Expansion Gaps
One of the most overlooked yet critical aspects of laminate flooring installation is allowing suitable expansion gaps.
Expansion gaps are essential due to the natural behavior of laminate materials, which tend to expand and contract in response to changes in temperature and humidity.
If these changes are not accommodated with adequate expansion gaps, the resulting pressure can lead to buckling, curling, or lifting of the laminate panels.
This not only depreciates the aesthetic appeal of your floor but also makes it unsafe and reduces its longevity.
Why are Expansion Gaps Essential?
Expansion gaps may seem unnecessary, especially when the laminate flooring fits perfectly in your room.
However, they are crucial in maintaining the integrity and look of your floor.
They accommodate the natural expansion and contraction of the laminate material due to changes in temperature and humidity.
Without these gaps, the material could warp or buckle under pressure, disrupting the even surface of your floor, causing tripping hazards, and possibly ruining your investment.
How to Ensure the Proper 1/4-inch Expansion Gap
Ensuring the right expansion gap when installing laminate flooring is not as complicated as it might seem.
A general rule of thumb is maintaining a 1/4-inch gap around the room’s perimeter. This includes any fixtures, such as cabinets or island bases, that also need room for the laminate to expand.
You can use spacers specifically designed for this purpose, available at most home improvement stores.
During installation, these spacers are placed between the laminate and the wall (or obstacle) and removed once complete.
This method ensures a consistent gap is left around all edges, maintaining the structural integrity of your laminate flooring.
7. Subfloor Debris
Subfloor debris can significantly impact the laminate installation process. The presence of dust, dirt, or small particles hinders the adhesion of the laminate panels to the subfloor, leading to an uneven and potentially unstable flooring surface.
Additionally, debris trapped under the laminate might cause noisy squeaks or creaks when pressure is applied, diminishing your space’s overall comfort and aesthetic.
Avoiding these issues necessitates a pristine, debris-free subfloor before installing your laminate flooring.
The Impact of Debris on Laminate Installation
When installing laminate flooring, the subfloor must be level and clean. Even minor debris can create noticeable bumps or unevenness in the finished floor.
This affects not only the floor’s appearance but also its functionality, as high spots may cause unnecessary wear on the laminate, reducing its lifespan.
The presence of debris can also compromise the locking system of the laminate planks, making it harder for them to join seamlessly, leading to visible seams or even gaps in the flooring.
Cleaning Tips for a Debris-Free Subfloor
Before you start the installation process, cleaning the subfloor thoroughly is crucial. Here are some practical tips:
- Sweep and Vacuum: Use a broom to sweep away larger debris and then vacuum to eliminate smaller particles. Pay special attention to the corners and edges of the room.
- Inspect and Repair: Inspect the subfloor for any signs of damage, such as indentations or protrusions. Repair any defects before proceeding with the installation.
- Mop: After sweeping and vacuuming, mop the floor with a damp (not wet) mop, ensuring a dust-free surface. Ensure the subfloor is completely dry before beginning the laminate installation to prevent moisture-related issues.
- Professional Cleaning: If the subfloor is exceptionally dirty or if past DIY cleaning attempts have not yielded satisfactory results, consider hiring a professional cleaning service to ensure a debris-free surface.
8. Warped or Damaged Planks
Another potential pitfall when installing laminate flooring is the use of warped or damaged planks.
Like the presence of debris, these can disrupt the flat, seamless surface you’re trying to create and may even result in more significant issues.
How to Find and Deal With Defective Planks
Defective or damaged planks are not always immediately obvious. These planks may look normal but can exhibit warping or bending once installed.
Inspect each plank carefully before installation, looking for signs of warping, cracks, or other deformities. If any are found, set these planks aside, and do not use them in your flooring.
Instructions for Replacing Problem Planks
If you discover a problem plank after it’s been installed, don’t panic. It’s relatively straightforward to replace individual laminate planks, even if they’re in the middle of your floor.
- Remove Baseboard: Remove the baseboard or molding surrounding the damaged plank.
- Disassemble Flooring: Disassemble the laminate flooring, working from the wall to the damaged plank. Remember to unlock the planks to prevent any extra damage carefully.
- Replace Damaged Plank: Once you reach the damaged plank, replace it with a new, undamaged one. Ensure the new plank fits securely and seamlessly with the surrounding planks.
- Reassemble Flooring: After replacing the plank, reassemble the floor, working your way back to the wall.
- Replace Baseboard: Finally, replace the baseboard or molding.
9. Inadequate Spacing Between Planks
Laminate flooring requires meticulous attention to detail during installation, especially plank spacing.
Neglecting to keep the correct spacing between planks can lead to several issues.
Effects of Incorrect Spacing
When laminate planks are installed too close together or too far apart, it can disrupt the uniformity of the floor and lead to aesthetic and functional problems.
Planks installed without adequate space can create pressure points, leading to buckling or warping over time.
On the other hand, too much space between planks can allow for excess movement, causing the planks to separate and create unsightly gaps in your floor.
Maintaining the Recommended Gap During Installation
To prevent these issues, it’s crucial to maintain a consistent gap between planks during installation.
The manufacturer recommends this gap, typically about 1/4 inch, to allow for natural expansion and contraction.
Utilizing spacers during installation can aid in maintaining this necessary gap. Once all planks are installed, the spacers can be removed, and baseboards or molding can neatly cover any remaining gaps.
10. Temperature Fluctuations
Temperature fluctuations can have a significant impact on laminate flooring. They can lead to expansion and contraction, causing warping, buckling, or gapping.
How Temperature Changes Affect Laminate
Laminate flooring material is highly sensitive to temperature changes. When the temperature rises, the laminate planks tend to expand, and when it cools, they contract.
If these changes are abrupt, the laminate might not have enough time to adjust gradually, leading to warping or buckling.
Similarly, in colder temperatures, the planks might shrink dramatically, causing gaps to appear between the planks.
These structural changes not only affect the aesthetic appearance of your floor but could also lead to long-term damage if not addressed promptly.
Tips for Maintaining Stable Room Temperature and Humidity
Maintaining a stable room temperature and humidity level can help mitigate these problems. Here are a few tips:
- Use Climate Control: Use a thermostat to keep the room at a consistent temperature. This can prevent drastic temperature fluctuations.
- Proper Insulation: Ensure your home is well-insulated to keep warm air in during the winter and out during the summer.
- Utilize Humidifiers or Dehumidifiers: Depending on your region’s climate, a humidifier can add necessary moisture to the air during dry months, while a dehumidifier can help remove excess humidity during damp periods.
- Radiant Heating: Consider installing radiant heating under the flooring if you live in a particularly cold climate. It provides a consistent temperature from the ground up and reduces the risk of shrinkage due to cold.
These steps can help you maintain your laminate flooring’s integrity and prolong its lifespan despite temperature fluctuations.
11. Heavy Furniture on Laminate Flooring
Heavy furniture can exert immense pressure on your laminate flooring, potentially causing indentations, scratches, or even cracks in the surface.
Over time, these damages can compromise the aesthetic appeal and structural integrity of your flooring.
The risk is particularly high when furniture is moved or dragged across the floor. Even static heavy furniture can gradually cause ‘pressure marks’ on the laminate, especially in cases of prolonged contact.
Protecting the Floor with Pads or Rugs
To minimize potential damage from heavy furniture, consider these preventive measures:
- Use Furniture Pads: Attach felt pads or rubber caps to the feet of your furniture. These pads distribute the weight of the furniture more evenly, reducing the pressure on any single point of your laminate floor. Ensure to replace these pads as they wear down over time.
- Lay Area Rugs: Using area rugs under heavy furniture can add a layer of protection for your laminate flooring. They prevent direct contact between the furniture and flooring and add style to your room. Choose rugs with a non-slip backing to ensure stability and safety.
- Avoid Dragging Furniture: When repositioning furniture, avoid dragging it across the floor. Instead, lift it completely or use furniture sliders if the item is too heavy.
By taking these measures, you can significantly extend the life and beauty of your laminate flooring.
12. Subfloor Irregularities
Subfloor irregularities play a substantial role in the issues that arise with laminate flooring.
Uneven subfloors can lead to problems like squeaking and bouncing off the floor or even damage the laminate planks over time.
Subfloor Imperfections in Laminate Issues
An uneven or imperfect subfloor can wreak havoc on your laminate flooring.
High spots on your subfloor can lead to an uneven surface, causing the laminate to flex whenever pressure is applied.
This flexing leads to an uncomfortable walking surface and exerts pressure on the locking systems of the laminate planks, potentially causing them to break or wear out prematurely.
Conversely, low spots in your subfloor can lead to gaps underneath the laminate, causing the floor to bounce or give a hollow sound when walked on.
Pre-Installation Steps to Address Subfloor Irregularities
Before installing laminate flooring, addressing any subfloor irregularities is crucial to ensure a smooth and durable finish. Here are some steps to tackle them:
- Inspect the Subfloor: Before starting the installation process, inspect the subfloor for any signs of irregularities like dips, cracks, or humps.
- Use a Level: A long, straight edge or level can help you identify high and low spots in your subfloor.
- Address High Spots: If you find any high spots, consider sanding them down or using a leveling compound to smooth them out.
- Fill Low Spots: Use a self-leveling compound to fill and level the area for any low spots.
- Ensure Dryness: Before installing laminate, ensure your subfloor is dry to prevent any moisture damage to your new floor.
Preventive Measures
Maintaining stable indoor conditions is one of the most effective strategies to prevent these issues and prolong the life of your laminate flooring.
This section delves into the importance of temperature and humidity control and how humidifiers can be used in dry conditions.
Maintaining Stable Indoor Conditions
Maintaining stable indoor conditions is paramount to the longevity of your laminate flooring.
Consistent temperature and humidity levels are critical in preserving laminate floors’ integrity and aesthetic appeal.
Extreme temperature fluctuations can cause the laminate to expand and contract, which may result in warping or buckling.
In addition, excessively high or low humidity can create problems. High humidity can lead to swelling and deformation, while low humidity can cause the laminate to become dry and brittle, leading to cracks or gaps.
Importance of Temperature and Humidity Control
Controlling the temperature and humidity in your home is not just about comfort – it’s also about protecting your flooring investment.
The ideal temperature for laminate flooring is around 60-80 degrees Fahrenheit (15-26 degrees Celsius), and humidity levels should be between 30% and 60%.
Constantly maintaining these conditions can help to prevent serious damage to your laminate flooring.
- Using Humidifiers in Dry Conditions
In dry conditions, a humidifier can be a vital tool for maintaining optimal humidity levels for your laminate flooring.
By releasing moisture into the air, humidifiers can help to maintain a consistent humidity level that prevents your laminate flooring from drying out and cracking.
It’s important to closely monitor humidity levels when using a humidifier to ensure they stay within the recommended range, as too much humidity can damage laminate floors.
Using Quality Materials
Investing in quality materials is crucial for the longevity and aesthetic appeal of your laminate flooring.
Let’s examine why this is important and how to ensure you choose the best materials possible.
Investing in High-Quality Laminate Flooring
High-quality laminate flooring offers numerous advantages to homeowners. Firstly, it’s incredibly durable, with a higher resistance to scratching and denting than lower-quality alternatives.
This makes it an excellent choice for homes with pets or high foot traffic. Secondly, high-quality laminate is more visually appealing, often featuring more realistic wood or stone textures and a wider variety of styles and colors.
Lastly, while the upfront cost may be higher, high-quality laminate generally has a longer lifespan, meaning that over time, it can be more cost-effective than cheaper, lower-quality alternatives.
Tips for Choosing Reputable Manufacturers
When choosing a manufacturer for your laminate flooring, reputation and track record are key. Look for manufacturers who are renowned for their quality and durability.
Reading reviews and asking for recommendations can provide valuable insights. Additionally, consider the warranty offered; a longer warranty period indicates the manufacturer’s confidence in their product.
You can also look for certifications that indicate the product meets certain quality and safety standards.
Finally, good customer service is a sign of a reputable manufacturer, so consider how well the company responds to inquiries and handles any issues.
Proper Maintenance of Laminate Flooring
Maintaining your laminate flooring correctly is critical to ensure its longevity and appearance.
Proper care and regular cleaning will protect your investment, making your flooring last longer and keeping it looking fresh and new.
Regular Cleaning and Maintenance
Regular cleaning and maintenance of your laminate flooring are not just about keeping it looking good.
Dust, dirt, and grime can scratch the surface of the laminate over time, damaging its finish. More so, spills, if not cleaned up promptly, can seep into the seams, causing the laminate to swell and warp.
By observing a regular cleaning routine, you can avoid these issues, preserving the aesthetics and functionality of your flooring.
Guidelines for Cleaning and Caring for Laminate Flooring
When cleaning your laminate flooring, a simple yet effective routine can go a long way. Use a soft broom or vacuum with a hard floor attachment to remove dust and debris daily.
Avoid using excessive water when mopping; use a damp mop or a laminate floor cleaner to clean your floor.
Remember, cleaning up spills to prevent water damage promptly is crucial. For stubborn spots or stains, use acetone or nail polish remover on a clean white cloth, then wipe the area with a damp cloth.
Lastly, placing doormats at entrances can help capture dirt before it gets on your floor, reducing the need for cleaning and prolonging the floor’s life.