
In the chill of winter, a frozen outdoor faucet can quickly escalate from an inconvenience to a costly problem. To help you navigate this common seasonal issue, we have identified 7 effective home remedies.
These approaches will not only thaw your frozen faucet but also ward off potential damage. From the simplicity of using a warm towel to the power of saltwater, knowing these remedies is crucial in saving time and money and preserving the longevity of your outdoor fixtures.
Recognizing the signs early and taking prompt action will surely prevent more severe damage. Get ready to dive into these solutions and learn how to ensure your faucets remain functional, regardless of how low the temperature drops.
Identifying a Frozen Outdoor Faucet
Signs of a Frozen Faucet
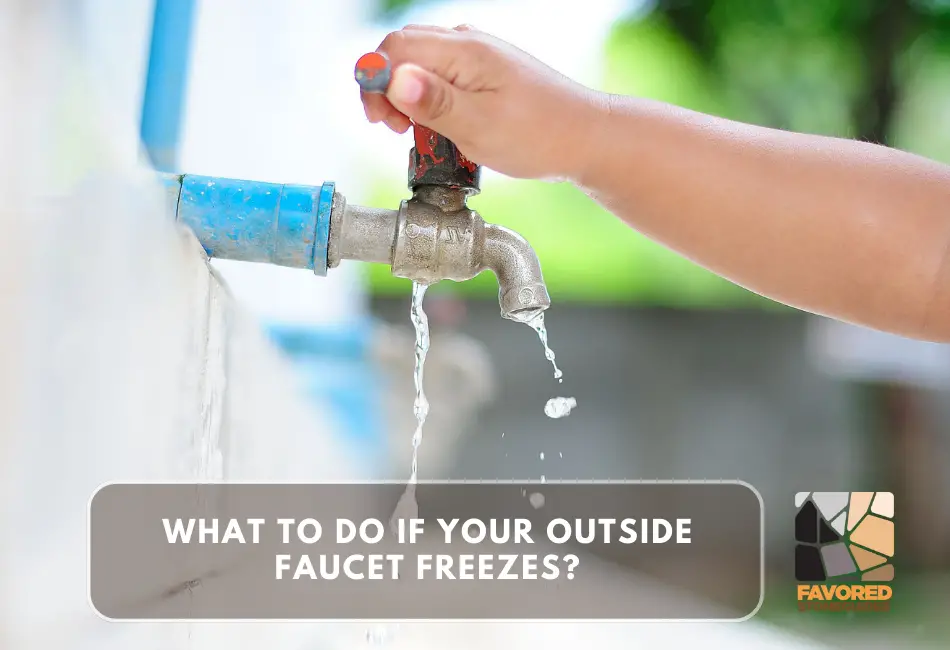
As a homeowner, I cannot stress enough how valuable it is to stay vigilant to the telltale signs of a frozen faucet.
I recall one brutally cold winter day, I turned the knob of my outdoor faucet, expecting a gush of water, and was met with only a trickle.
The diminished water flow was the first clue. Noticing this early enough can be a game-changer in preventing further damage.
Apart from that, an unusual frostiness covering the pipe can also be another telltale sign. I remember being confused the first time I saw this.
I touched the pipe, and it was as cold as ice itself! These signs might seem obvious in hindsight, but remember, they are easily overlooked in our hustle-bustle life.
Locating the Freeze Point
Finding the freeze point can be a bit of a challenge. I often call it the hide-and-seek game I never signed up for.
However, with time, I’ve realized it’s not as tricky as it sounds. The freezing point is typically the area on your pipe exposed to cold weather, like a section that’s not insulated or has poor insulation.
One chilly evening, I noticed my faucet running slower than usual. I immediately sprung into action, running my hands along the length of the pipe, starting from the faucet knob and moving inwards.
I could feel the icy sting as I reached the poorly insulated section of the pipe. There was the freezing point, exactly where the insulation was missing.
It’s important to remember that each situation is unique, and your freeze point might be in a different location.
So, don’t lose heart if you don’t locate it immediately. Perseverance is key here. If you’re vigilant about the signs and know where to look, you win half the battle against a frozen faucet!
Safety Precautions
Taking safety precautions is the stepping stone in dealing with a frozen faucet.
Because while we are in the business of saving our pipes, we don’t want to endanger ourselves in the process. It’s always safety first. Here’s how:
Turning off the Water Supply
The first thing I do before starting my ‘freeze hunt’ is to turn off the main water supply. I remember a time when I didn’t.
I was dealing with a minor freeze, or so I thought, and I hadn’t bothered to turn off the water. You can probably guess what happened next.
The pipe burst, resulting in a small-scale flood in my basement. Lesson learned: Always turn off the water supply.
Using Appropriate Safety Gear
It’s not just about turning off the water, though. Safety also involves protecting yourself physically.
I learned this the hard way when I once tried to thaw a pipe with a heat lamp and ended up with a minor burn on my hand.
Now, I always use appropriate safety gear. This means wearing thick gloves to protect my hands from the cold pipe and any heat source I might be using.
Safety goggles are another must to protect my eyes from unexpected pipe bursts. Remember, safety gear is not optional. It’s an essential part of the process.
7 Home Remedies to Thaw a Frozen Faucet
These are some methods I’ve picked up over the years – tried and tested remedies that could help you thaw a frozen faucet.
Remember, what works for one might not work for all, so keep an open mind and be ready to try different tactics.
1st Remedy: Hairdryer Method
My first choice for thawing a frozen faucet is always the hairdryer method. This strategy is easy to implement and safe for both you and your pipes. Here’s how it works:
Start by plugging in your hairdryer and setting it to medium or high heat. Then, aim the warm air directly at the pipe, starting at the faucet end and gradually moving along the length of the pipe.
Remember to keep the heat source moving up and down. Don’t focus on one spot for too long, as this could risk damaging the pipe.
One point to note is that patience is key with this method. Thawing will not happen immediately. I recall a nasty freeze where I spent an entire evening going back and forth along the pipe with my trusty hairdryer.
But it’s worth the effort – that long night saved me the cost and inconvenience of a plumber’s visit!
The hairdryer method is particularly useful because it requires no special equipment – most households have one.
Additionally, it’s a good option for pipes that are easily accessible and not enclosed within walls. So, next time you’re faced with a frozen faucet, why not give the hairdryer method a go?
2nd Remedy: Hot Water Soak
The hot water soak is another practical approach to thawing a frozen faucet, requiring only a few towels and hot water.
This technique is as straightforward as it sounds: Soak towels in hot water, then wrap these warm, damp towels around the frozen pipe.
This method can be slow, as the towel heat gradually penetrates the pipe’s surface to reach the ice inside.
However, the benefits of this technique are twofold. Firstly, it ensures a steady, even heat distribution along the pipe, minimizing the risk of pipe damage.
Secondly, it allows for hands-off thawing – you can set it up and then attend to other tasks while nature takes its course.
I fondly recall a particularly festive incident when I found myself wrapping pipes instead of Christmas gifts!
I spent most of the holiday ensuring the towels remained hot and doing periodic checks on the pipe.
By the time the turkey was out of the oven, I could hear the sweet trickle of running water from the previously frozen faucet. It was slow, but the unmistakable sign of success was worth the effort.
So, despite its slower pace, the hot water soak method is a reliable and user-friendly approach to dealing with a frozen faucet.
3rd Remedy: Space Heater
Last winter, when I grappled with a frozen faucet in my garage, I resorted to using a space heater.
The trick to using this method effectively is ensuring a safe distance between the heater and the pipe, thus eliminating any fire hazard.
The space heater slowly radiates heat towards the pipe, which gradually thaws the ice within.
However, this method is most effective in larger, well-ventilated areas to prevent the build-up of carbon monoxide, a potential byproduct of some space heaters.
So, if you’re facing a frozen pipe situation in a spacious and airy room, consider employing the space heater technique.
It’s a hands-off, effective solution that lets you continue your day while the heater does the work.
4th Remedy: Heat Gun
The heat gun is an incredibly efficient tool for thawing frozen pipes, and it’s akin to a high-power hairdryer. I found myself reaching for this tool during one particularly stubborn freezing incident.
The heat gun emits a concentrated hot air flow, directly targeting and rapidly thawing the pipe’s ice.
However, remember that the heat gun operates at significantly higher temperatures than the previous methods we’ve discussed.
Therefore, keeping the gun moving along the pipe is crucial, and not focusing on one area for too long is crucial.
Prolonged exposure to the intense heat can risk damaging the pipe, which might lead to even more severe issues.
Another essential aspect to note is safety. Always ensure you’re wearing heat-resistant gloves to protect your hands and maintain a safe distance between the nozzle of the gun and the pipe.
Remember to give the pipe time to cool down before touching it or applying any further remedial measures.
5th Remedy: Salt and Alcohol Solution
This fifth remedy is a traditional method handed down through generations. It’s none other than the Salt and Alcohol solution.
This technique involves a mixture of salt, water, and rubbing alcohol. The process begins by combining these three ingredients in a bowl, creating a highly effective solution for thawing frozen pipes.
The next step is to pour this solution down the affected pipe carefully. The salt and alcohol work together to lower the freezing point of water, accelerating the thawing process in a non-abrasive manner.
But bear in mind that this remedy often works at a slower pace compared to other methods. However, its efficacy in avoiding pipe damage makes it worth the wait.
One of the notable aspects of this method – and my personal favorite – is the distinct, satisfying crackling sound it produces as the solution works its way through the ice.
This sound is more than just a delightful auditory experience; it’s an acoustic sign of progress. But while this method can be pretty effective, it’s important to remember that it often takes time and patience.
So, if you’re not in a rush and prefer a more gentle yet effective approach, the Salt and Alcohol solution is an excellent choice!
So, these are my top 5 home remedies to help you tackle that frozen faucet. Remember, patience is key – pipes are delicate, and the last thing we want is a burst pipe on our hands!
Preventative Measures
Now that we’ve talked about how to handle a frozen faucet let’s switch gears and discuss how we can prevent this issue in the first place.
After all, as the old saying goes, “An ounce of prevention is worth a pound of cure.”
- Insulating your outdoor faucet
I remember one winter when I was just a rookie in DIY plumbing, I neglected to insulate my outdoor faucet. As you can imagine, things didn’t go well.
The pipe froze and burst, causing a mini flood in my garden. After that, I learned my lesson and have always been careful to insulate my outdoor faucet.
Insulating your outdoor faucet is a straightforward task that can save you from a boatload of trouble. All you need is some insulating foam and duct tape.
Wrap the foam around the pipe leading to the faucet and secure it with duct tape. This added insulation layer can prevent the faucet from freezing, even when the temperature drops below freezing.
- Using faucet covers
If you’re like me, you might think, “Insulating foam seems a bit messy and unsightly.” That’s where faucet covers come in handy. I’ve been using these for years, and they’re a lifesaver.
They’re simple to install, neat, and effectively protect your faucets from freezing temperatures.
Faucet covers are dome-shaped plastic or styrofoam devices that you can easily fit over your outdoor faucets.
They provide an air pocket of insulation that keeps the cold air away from your pipe, preventing it from freezing.
- Keeping a slow drip during cold spells
This is a trick my grandmother taught me, and it’s served me well over the years.
When the weather forecast predicts a cold snap, turn on your faucet so it’s dripping slightly. This might sound counterintuitive, but it works!
You see, moving water has a more challenging time freezing than still water. Keeping a slow drip ensures that water in the pipe is continuously moving, which can prevent freezing.
But remember, it should be a slow drip, not a steady stream. We’re aiming to prevent freezing, not waste water.