
Waterproof laminate floors, as the name suggests, are a type of flooring designed to resist water damage while still offering the aesthetic appeal of traditional hardwood.
This type of flooring is becoming an increasingly popular choice in homes due to its durability and ease of maintenance.
However, like any flooring, it’s essential to clean it properly to maintain its aesthetic appeal and extend its life.
So, how do you ensure you’re cleaning your waterproof laminate floors correctly? This guide will walk you through the best methods and practices for keeping your floors looking their best.
Waterproof Laminate Flooring
First, let’s discuss what makes a laminate floor “waterproof.” It’s all about the construction.
Waterproof laminate flooring comprises four layers: a back layer to resist moisture, a high-density fiberboard for stability, a decorative layer with the hardwood design, and a wear layer that protects against scratches and spills.
I remember when I first learned about this. I was so surprised that something so practical could also be beautifully designed!
Benefits of Waterproof Laminate Flooring
Now, why should you consider waterproof laminate flooring for your home? The benefits are numerous.
This flooring is not just resistant to water damage but also scratches and dents, making it an excellent choice for households with children or pets.
I can personally affirm this. Since I installed waterproof laminate flooring in my home, I’ve found it much easier to clean and maintain, especially with my two Labrador retrievers running around!
Misconceptions About Waterproof Laminate
Lastly, I’d like to address some common misconceptions about waterproof laminate flooring. Many people mistakenly believe that “waterproof” means “invincible.”
However, while these floors are designed to resist typical household spills or pet accidents, they are not meant to be fully submerged in water or subjected to continuous high-moisture conditions.
Trust me, I learned this the hard way when my dishwasher leaked overnight, and I had to replace part of my flooring.
Remember, waterproof laminate flooring is a durable and practical choice, but like anything, it has its limits.
Gathering Supplies for Cleaning
Before you start cleaning your waterproof laminate floors, it’s crucial to gather the right supplies.
Using the proper tools can make all the difference between a spotless floor and a mediocre one. Here are the items I suggest:
List of Necessary Cleaning Supplies
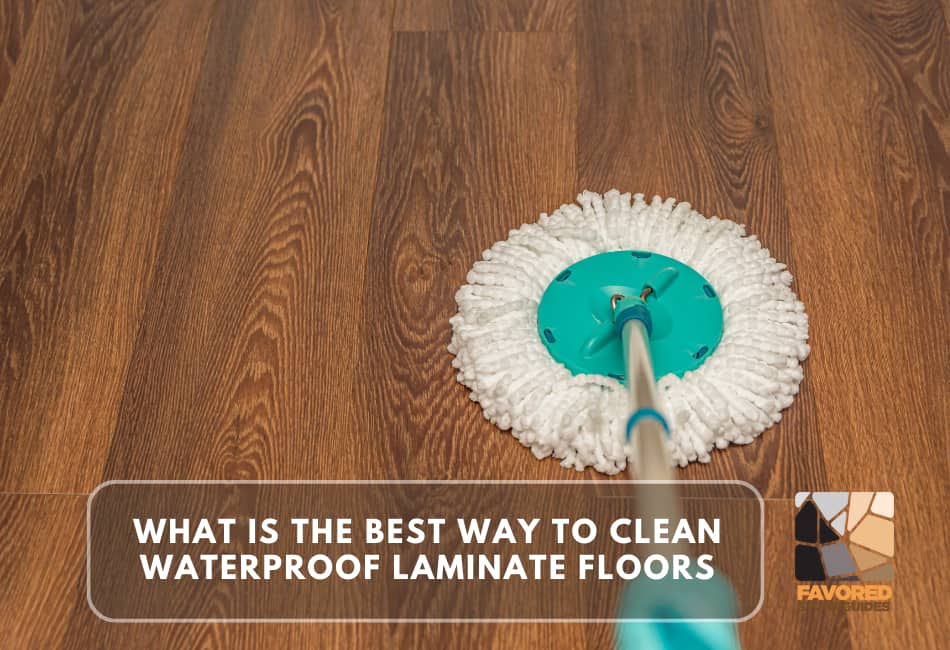
- Microfiber mop: When I first began cleaning my laminate floors, I used a traditional string mop. I soon realized that this was leaving streaks and water residue. However, switching to a microfiber mop made a world of difference. It’s more absorbent and doesn’t leave any streaks behind.
- pH-balanced laminate floor cleaner: A pH-balanced cleaner is gentle on the laminate but powerful enough to tackle dirt and grime. I’ve used various cleaners over the years, but the pH-balanced ones always leave my floor looking the brightest and cleanest.
- Soft-bristle broom: A broom with soft bristles is perfect for daily sweeping. It can easily capture dust and debris without scratching the laminate. The difference this made in my weekly deep cleans was astounding.
- Warm water: Warm water is excellent for helping to break up stubborn spots. Just remember not to use it too much. Too much water can cause the laminate to swell and warp.
- Vinegar (optional): While not necessary, vinegar can be an excellent natural alternative to a commercial floor cleaner. I used a vinegar solution when I first moved into my house and hadn’t yet purchased a proper cleaner. It worked surprisingly well!
Importance of Using the Right Tools
When I first installed my waterproof laminate flooring, I thought any old mop and bucket would do the trick.
However, I quickly learned that using the right tools is crucial. Improper tools can scratch the laminate, leave behind residue, or even allow water to seep in, causing damage.
After investing in the right tools, my floors have never looked better, and honestly, cleaning them has become a much more manageable task.
Regular Maintenance Routine
Dry sweeping and dusting
- Use a soft-bristle broom:
Like me, I’m sure you’d prefer a clean and shiny floor any day. But achieving that with a broom that scratches your laminate?
Not happening. I can’t stress this enough – a soft-bristle broom is your best friend. It gently lifts the dust without harming your floor in any way.
I sweep my house every morning, and I can tell you, it’s a game-changer.
- Microfiber mop for efficient dust removal:
For dry mopping, I swear by my microfiber mop. It’s like magic!
It picks up even the finest dust particles and pet hair (which is a big issue for me with two dogs at home).
And the best part? It doesn’t leave any streaks or scratches on the floor.
Spill and stain prevention
- Importance of quick cleanup:
Accidents are part of life, and they happen. You should see me when I spill coffee on my laminate flooring – I’m on it like a hawk!
The faster you clean up the spill, the less chance it has to leave a stain. Plus, letting liquid sit on laminate can lead to damage.
Trust me, being quick on your feet can save you a lot of trouble later on.
- Using rugs and mats in high-traffic areas:
Place floor mats and rugs in high-traffic areas and spill-prone spots – like near the kitchen sink or dining table.
I’ve got a beautiful mat by my front door, and it’s saved me from countless shoe scuff marks and dirt being tracked inside.
Protecting against pet scratches
- Use pet-friendly felt pads on furniture legs:
My Labrador, Bella, is an energetic one. She loves to play around, often bumping into furniture and shifting it around.
To prevent her games from leaving marks on my laminate, I have placed felt pads on all my furniture legs.
Now, even if Bella decides to turn my living room into a playground, my floor stays scratch-free!
- Regular nail trimming for pets:
If you have pets, make sure to keep their nails trimmed. Long nails can scratch your laminate flooring.
Bella and Daisy, my dogs, get their nails trimmed regularly. It’s not only suitable for the floor but also for them.
They are much more comfortable and less prone to slipping on the laminate with well-trimmed nails.
Deep Cleaning Techniques
Step-by-step process for deep cleaning
1. Mixing a solution of warm water and pH-balanced laminate floor cleaner:
- I would like to start my deep cleaning journey by making my own cleaning solution.
- It’s simple – I take warm water and mix it with a good, pH-balanced laminate floor cleaner.
- The warm water helps to dissolve any grime, and the floor cleaner provides that extra cleaning power to remove stubborn dirt.
- The key is only to use a pH-balanced cleaner to avoid damaging the laminate.
2. Damp mopping the floor:
- Once I have my solution ready, it’s time for business.
- I dampen my mop with the solution and start mopping.
- I always make sure the mop isn’t too wet – just damp.
- Too much water can seep into the laminate and cause damage.
- Trust me, I learned this the hard way!
3. Avoiding excess moisture:
- I make it a point to dry the floor immediately after mopping.
- I use a dry mop or towel to soak up any excess water.
- This is a must-do for preventing moisture damage.
Tips for cleaning tough stains
- Removing gum and wax: If there’s a piece of gum or wax stuck on the floor, I use a plastic knife or scraper to remove it gently. I learned this trick from a friend, and it works wonders without scratching the floor.
- Dealing with scuff marks: For scuff marks, a simple eraser does the trick. Yes, an eraser! Just rub it on the mark and watch it disappear. I was initially skeptical, but this has often saved me from unnecessary scrubbing.
- Addressing wine, juice, and food stains: I attack these with my homemade solution of warm water and pH-balanced cleaner. If the stain is stubborn, I let the solution sit for a few minutes before wiping it away.
The option of using a vinegar solution
- Precautions when using vinegar: Vinegar is a powerful cleaner, but it can be harsh on laminate flooring if not diluted properly. I learned this when I had a dull finish after using a robust vinegar solution. Now, I always make sure to dilute it well.
- Steps for creating and using a vinegar solution: I mix one cup of vinegar with a gallon of warm water. Then, I follow the same process as above – damp mop, clean, and dry. It leaves my floor shiny and clean, but remember, it’s essential to use this sparingly to avoid damaging the finish.
Maintenance Tips for Longevity
Proper care to extend the lifespan of your laminate floor
- Regular cleaning schedule: To maintain the beauty and longevity of my laminate flooring, I’ve found that a regular cleaning schedule is essential. I sweep and vacuum at least once a week, depending on foot traffic, to remove dust, dirt, and other abrasive particles that may scratch the surface. As a bonus, keeping a regular cleaning schedule also helps keep my home tidy and fresh!
- Avoiding abrasive tools: Another lesson learned the hard way: always avoid abrasive tools. I once used a steel wool pad to remove a stubborn stain and ended up with unsightly scratches on the floor. Now, I only use soft-bristle brooms, microfiber mops, and a vacuum with a bare floor setting to protect the laminate surface.
- Maintaining proper humidity levels: I discovered that laminate floors react to changes in humidity. Excessive humid conditions can cause the boards to swell and buckle, while extremely dry conditions can lead to shrinkage and gaps. To counter this, I maintain an indoor humidity level of 35% – 65%. I have even invested in a humidifier and a dehumidifier to help maintain these levels, especially during extreme weather conditions.
Checking for manufacturer recommendations
- Warranty considerations: Before diving deep into cleaning and maintenance, I learned the importance of reviewing the manufacturer’s warranty conditions. Manufacturers often provide specific cleaning and maintenance instructions that, if not adhered to, can void the warranty. Trust me, nothing feels as bad as discovering that your warranty is void when you most need it!
- Special care instructions: Each laminate flooring can have unique care demands that the manufacturer’s layout. When I first installed my laminate floor, I was surprised to learn it needed waxing! But it turns out that particular brand recommended it for additional protection. So, always read and follow the manufacturer’s special care instructions to ensure your laminate floor remains in optimal condition.
Common Issues
Despite our best efforts, sometimes issues arise. Below, I share some of the common problems I’ve had to tackle, providing you with potential solutions and a little dose of reassurance.
Dealing with warping or buckling
The first time I noticed a buckled board on my laminate floor, I was panic-stricken. It turned out to be an issue of humidity imbalance.
My trusty dehumidifier came to the rescue, reducing the moisture in the air, and over time, the buckled board settled back into place.
However, if the buckling persisted, I was prepared to bring a professional to replace the damaged board.
It is important to remember that it’s better to be safe than sorry when preserving your floor’s integrity.
Repairing minor scratches and dents
I’ll confess, it was my adorable (yet sometimes clumsy) Labrador Retriever who caused the first scratch on my laminate.
I was upset, but I soon learned that minor scratches and dents can be handled with a laminate repair kit.
It was easy to use and fixed the scratch effectively, making it almost invisible. Remember, you don’t have to be a professional to take care of minor repairs!
Handling water damage
Once, a potted plant leaked and caused water damage on my laminate floor. I immediately cleaned up the excess water and dried the area thoroughly.
I also used fans and dehumidifiers to expedite the drying process. Unfortunately, the damage was significant, and I had to replace the affected boards.
My key takeaway? Never let standing water sit on laminate flooring – the sooner you can clean it up, the better!
Conclusion
As I’ve journeyed through the world of laminate flooring, I’ve learned one crucial lesson – taking proper care of your floors is essential.
I’ve faced buckling, scratches, and even water damage, and each hurdle has underscored the importance of diligent maintenance.
Each challenge reminded me that each floorboard is not just a component of my house but a part of my home, narrating stories of gatherings, pet shenanigans, and even a few mishaps.
Best practices can’t be emphasized enough when maintaining clean and attractive floors.
Regular cleaning with suitable materials, prompt action on spills, and protective measures for furniture are some that come to mind.
I can proudly say that my floors are a testament to these practices, gleaming with a shine that’s not just from the laminate but also from the love and care they receive regularly.
So, my fellow laminate floor owners, it’s time to roll up those sleeves and get down to business! With a little effort and care, your floors can shine with resilience and beauty for years.
Don’t let the fear of possible issues deter you. Armed with the right knowledge, tools, and patience, you are more than equipped to enjoy long-lasting, beautiful laminate flooring.
Your laminate floor is not just a surface to walk on – it’s a canvas of memories waiting to unfold. Remember, the floor is the foundation of a cozy, inviting home. So, let’s treat it that way!