
Vinyl plank flooring installation is a task that demands accuracy, attention to detail, and the right resources.
When executed correctly, it results in a resilient, aesthetically pleasing floor that can withstand heavy use for years.
However, the durability, performance, and overall appearance of your vinyl plank flooring largely hinge on the quality of the installation process.
This comprehensive guide elucidates the nine crucial steps in vinyl plank flooring installation.
By following these steps, you can ensure a successful installation that combines durability and elegance in your living space.
1. Pre-Installation Preparation
Before you dive into the installation process, there are a couple of things you need to take care of.
Preparation is vital for a smooth and successful installation of vinyl plank flooring. Let’s explore the steps in detail.
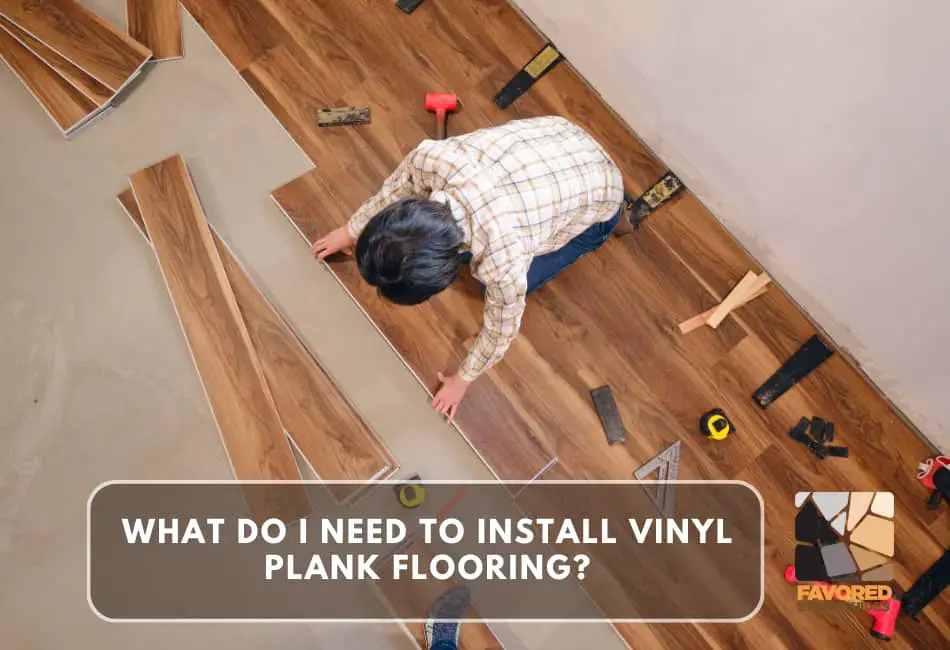
Gather the Necessary Tools and Materials
First, you’ll need to gather all the essential tools for the job. In my experience, I’ve found that having a measuring tape, a utility knife, and a suitable adhesive handy makes the process of vinyl plank installation seamless.
The measuring tape helps to ascertain the exact size of the area, while the utility knife is perfect for trimming the planks to fit. The adhesive comes into play to firmly secure the planks to the floor.
Let’s not forget about safety! I remember a time when I ignored safety measures and ended up with a few minor injuries – not a pleasant experience, I assure you.
Therefore, I highly recommend wearing protective gloves to prevent any cuts or splinters and knee pads to cushion your knees, as you’ll be spending quite a bit of time on the floor.
Acclimate the Vinyl Planks
Once the tools are ready, it’s time to acclimate the vinyl planks – an often overlooked but critical step.
This process adjusts the temperature and humidity level of the planks to match your room conditions to prevent subsequent contraction or expansion.
I learned this the hard way when I installed vinyl flooring in my home for the first time. I skipped the acclimation process, and a few months later, the planks started to warp.
I suggest you lay out the vinyl planks in the room where they will be installed and leave them for at least 48 hours before starting the installation.
This duration allows the planks to adapt to the room’s conditions, creating a more stable and long-lasting floor. Trust me; this might seem time-consuming, but it’s worth the wait!
2. Surface Preparation
Check Subfloor Condition
Before you lay the vinyl, you must give your subfloor a thorough inspection. Trust me, folks, it’s worth your time.
I remember once, when I thought I could get away with skipping this step, I ended up with a floor that was uneven and not nearly as beautiful as it could have been. Don’t make the same mistake I did!
- Inspect for evenness and structural integrity
Start by checking for any obvious signs of damage, like cracks or holes. Then, look for more subtle issues such as unevenness.
An easy trick I use is to place a marble or small ball on the floor and see if it rolls. If it doesn’t move, your floor is likely level. But if it does, you might need to work to even it out.
- Repairing or replacing the damaged subfloor
If you do find any areas that are damaged or uneven, you’ll need to repair or replace that portion of the subfloor.
I learned the hard way that simply laying vinyl over an uneven surface can cause issues down the line, including cracking or shifting of your beautiful new floor.
So, invest the time upfront to repair any damage and ensure your subfloor is perfectly smooth and level.
Clean and Remove Debris
- The need for a clean and smooth surface
After inspecting and repairing your subfloor, the next step is cleaning. And no, this isn’t just because I like a clean work area (though that is true!)
It’s because any dirt or debris on the surface can create bumps under your vinyl flooring, ruining its smooth finish.
When I first installed vinyl flooring in my brother’s home, we didn’t clean properly, and let me tell you, it wasn’t a pleasant sight!
- Guide removing dirt and debris
Start by sweeping the area well to remove any loose dirt and debris. Then, consider using a vacuum to get rid of any dust that may have accumulated.
Finally, I like to wipe the floor down with a damp mop to ensure it’s completely clean. Remember, patience is key here.
Take your time and ensure the surface is spotless before moving on to the next step. It will pay off in the end, trust me!
3. Underlayment Installation
The Purpose of Underlayment
Underlayment is like the unsung hero of any flooring project. Its main purpose is to provide a smooth, flat surface for the new flooring to sit on.
But it also offers other benefits like noise reduction, moisture protection, and comfort underfoot. I remember when I installed laminate flooring in my own home.
Without the underlayment, the room echoed with every step I took. However, once the underlayment was in place, the noise was significantly reduced. It’s a step you don’t want to overlook!
Installing the Underlayment Material
Installing the underlayment is an easier task than you might think, and here’s how you can do it.
Steps for Different Underlayment Types
- Foam Underlayment:
Foam is a popular choice because it’s lightweight and easy to install. Roll it across your floor, ensuring it lies flat with no wrinkles.
I usually start at one end of the room and work my way to the other. As you roll it out, be sure to butt the edges of the foam together – don’t overlap them.
It’s like laying a puzzle, each piece has its place. Once it’s all laid out, you can use a utility knife to trim any excess foam along the walls. Then, secure it down with tape along the seams.
- Cork Underlayment:
Cork is another excellent choice, especially for its eco-friendly properties. It’s a bit more challenging to install than foam, but not to worry, you’ve got this!
Similar to foam, you’ll roll the cork out across your floor. However, cork tends to be heavier and can fray at the edges, so be extra careful when trimming.
I found that using a straight edge as a guide when cutting helped to keep my lines straight.
Once it’s all in place, you’ll secure the cork with adhesive rather than tape. You’ll apply the adhesive to the subfloor and lay the cork on top.
Remember, the time and effort you put into installing the underlayment will directly influence the final look and feel of your new floor.
So take your time and do it right, and soon you’ll be standing back admiring your beautiful new floor!
4. Layout Planning
Before you jump into laying your floor, there’s something you need to consider: Layout Planning.
This is something I learned the hard way when I first started. Trust me, a little bit of planning saves a lot of headaches later.
Layout considerations
- Staggering Seams:
Staggering the seams of your flooring creates a more natural and appealing mosaic pattern, enhancing the authenticity of your floor.
I remember my first flooring project. I lined up all the seams, and the result looked unnaturally uniform.
It’s best to aim for a random seam placement for a more appealing look. Plus, staggering also increases the strength and stability of the floor.
Aligning Planks with the Room’s Geometry
This one is a bit trickier but equally important. Always consider the room’s orientation when laying out your planks.
I found that aligning planks parallel to the primary light source, like windows, helps create a harmonious appearance.
The direction of the planks can significantly impact the room’s visual size. For a long, narrow room, I found that placing the planks parallel to the longest wall makes the room seem more expansive.
Use a Dry Run
A dry run is essentially a rehearsal before the actual performance. In the flooring context, laying out your planks without adhesive to get a feel for how they’ll fit and look.
I can’t stress enough how this has saved me from countless potential errors. Mistakes are much easier to fix during a dry run!
- How to Lay Out Planks Without Adhesive
To do a dry run, lay your planks on the underlayment without adhesive, following the alignment and staggering plan you’ve decided on.
It’s like a practice run. I vividly recall how my dry run flagged a miscalculation I had made in the quantity of planks needed.
Luckily, I was able to order more before I started the actual installation. Always remember, the dry run is your safety net. Use it wisely!
5. Cutting Vinyl Planks
Cutting vinyl planks accurately and safely is a significant part of flooring installation. I’ve learned that precise cuts can differentiate between a professional-looking job and a DIY disaster. Here’s my guide on how to do it right.
Measuring and Marking Planks
The first step in cutting vinyl planks is measuring and marking them accurately. I always start by measuring the space where the cut plank will be installed.
Then, I transfer that measurement to the plank. I’ve found that it’s best to use a straight edge and a non-permanent marker for this task.
Remember, measure twice, cut once – this is a saying I’ve found to be true repeatedly in my flooring projects.
Using a Utility Knife or Saw
Once the plank is marked, it’s time for the cutting. I’ve used a utility knife and a saw, and each has its place.
For straight, simple cuts, I prefer a utility knife. I score the surface along the marked line, then snap the plank along the score.
For more complex cuts, like around door frames, a jigsaw works best. It can handle curves and corners with ease. Again, take it slow and remember precision is critical.
Safety While Cutting
I cannot overemphasize the importance of safety when cutting vinyl planks. I always ensure I’m working on a stable surface and I’m focused on the task at hand.
One lapse in attention can lead to accidents. I always wear safety glasses to protect my eyes from flying debris.
If I’m using a saw, I also use hearing protection. And of course, I always keep my fingers well clear of the cutting path. Safety first, always – it’s a mantra that’s served me well in all my DIY projects.
6. Adhesive Application
Applying the adhesive is a crucial step in installing vinyl planks. Depending on the kind of vinyl planks you have chosen, you might be dealing with a “peel-and-stick” variety or a “glue-down” option.
Adhesive Options
The choice between peel-and-stick and glue-down largely depends on your comfort level and the specific requirements of your project.
Peel-and-stick planks come with pre-applied adhesive, making them a breeze to install. You need to peel off the backing and stick the plank down.
I recall my first project using peel-and-stick tiles – the convenience and user-friendliness were unparalleled. Yet, the downside is that they may not adhere as well as glue-down planks in the long run.
Glue-down planks, on the other hand, require an extra step and a bit more time, as you need to spread adhesive on the subfloor before laying down the planks.
However, they offer a more secure bond, ensuring the planks stay in place for the long haul. It was during my second flooring project that I opted for the glue-down method.
The process was more laborious, but the finished floor was incredibly sturdy and has held up well over time.
How to Apply Adhesive Correctly
Applying adhesive should be done carefully, as improper application can lead to issues.
- Trowel Application
One standard method is using a trowel. When I use a trowel, I spread the adhesive in a thin, even layer across the subfloor, taking care not to leave puddles or dry spots.
It’s like frosting a cake – you want a smooth, consistent layer.
- Rolling Planks into Adhesive
Once the adhesive is spread, the next step is to lay the vinyl plank down and roll it into place.
This ensures a good bond between the plank and the adhesive. I remember my father’s old wooden flooring roller that I used for this purpose – the nostalgia it brought, coupled with the satisfaction of a job well done, made the task seem less taxing.
Push from the center of the plank towards the edges to remove any air bubbles and ensure a snug fit.
Remember, patience and precision are critical in these steps. Taking the time to apply adhesive correctly will pay off in the form of a professionally finished, durable floor.
7. Plank Installation
Setting a starting point and establishing reference lines are pivotal to a successful vinyl plank flooring installation project.
In my experience, I’ve found it helpful to pick a wall that’s most visible as my starting point.
The goal is to make the seams less noticeable, and this wall often turns out to be the longest or the one opposite the main entryway.
I then draw a straight line across the room parallel to this starting wall, serving as my reference line.
Remember, this step requires meticulous measurement as it can significantly impact the alignment of your entire floor.
Step-by-Step Instructions on Installing Vinyl Planks
- Ensuring Tight Seams
Firstly, it’s important to remember that the quality of your vinyl floor depends on the precision of your seams.
I recommend placing the new plank at an angle against the previous one and rotating it down until the seams meet.
My trick is to use a scrap piece of flooring to tap along the seam gently, ensuring a tight, seamless fit.
- Dealing with Obstacles (e.g., Door Frames)
Encountering obstacles like door frames is inevitable during the installation process. I recall using a coping saw to cut the bottom of door frames so the flooring would slide under it neatly.
It’s important to remember to account for the additional height of the underlayment – an error I made during one of my early projects.
- Tips for Corners and Edges
Corners and edges can be tricky, and learning to navigate these can make or break your DIY project.
I suggest cutting the planks to size, leaving enough space for expansion. When cutting corners, I found it helpful to use a carpenter’s square for accurate measurements.
For the edges, I’ve often utilized a utility knife for precision cutting. The satisfaction of seeing a perfectly laid edge is quite unmatched!
Patience, alongside careful measurement and cutting, truly pays off when dealing with corners and edges.
8. Seaming and Trimming
Creating a seamless and professionally finished vinyl floor is a testament to your DIY prowess. Let’s delve into the details.
Creating Clean Seams Between Planks
A well-seamed vinyl floor showcases not just your craftsmanship but also protects the floor’s integrity against moisture and wear.
The trick lies in handling the planks gently yet firmly. Place the new plank at a slight angle against the previous one and then rotate it down until the seams meet.
Repeat this process with each new plank, ensuring the seams are aligned perfectly. I learned this the hard way when I had to redo my living room flooring due to misaligned seams. So, always remember – precision is key!
Trimming for a Professional Finish
After laying the planks, professional trimming gives the final touch to your DIY project. Here’s how:
- Trim Excess Material:
Excess material at the edge of the room not only looks untidy but can also lead to buckling.
Using a sharp utility knife, trim the overhanging material from the edge of the room.
I remember, during my kitchen floor revamp, leaving the excess material led to the flooring buckling up near the refrigerator.
I had to reinstall the entire section – a lesson learned!
- Dealing with Irregular Shapes or Obstacles:
Encountering obstacles like columns or irregularly shaped rooms can be challenging.
In such cases, create a template using a piece of cardboard, cut it to fit the shape of the obstacle, and then trace it onto the plank.
Carefully cut along the drawn line, ensuring a neat fit around the obstacle. This technique saved me when working on a client’s house with a circular fireplace in the center of the space.
The result was a perfectly cut vinyl plank that fit like a glove around the fireplace. It was a proud moment indeed!
9. Transition and Finishing
The unsung heroes of an excellent flooring job are transition strips. These not only create a seamless flow between different flooring types but also provide a neat, professional finish.
When I first renovated my home office, I overlooked transition strips, thinking it wasn’t necessary.
But soon, the difference between the carpet in the hallway and the vinyl plank flooring in the office looked stark and unfinished.
I then installed an appropriate transition strip and was amazed at the result. It’s a small detail that can make a huge difference!
The Importance of Expansion Gaps
Expansion gaps are an integral part of any flooring project that you must not underestimate.
They allow the flooring to expand and contract with temperature changes, preventing warping or buckling.
I can’t stress this enough – don’t skip this step! I made this mistake during my first DIY flooring project, and despite all the hard work, I ended up with buckling flooring within a year.
Always plan for an expansion gap around the perimeter of your room.
Installing Baseboards and Shoe Molding
Finally, installing baseboards and shoe molding brings the whole project together. They hide the expansion gaps and create a neat, finished look.
I’ve found that painting or staining the baseboards before installation makes the job much easier. My first time doing this, I installed, then painted, and spent hours correcting the paint drips on my newly installed floor.
Trust me, painting first will save you a world of hassle. After the baseboards are installed, attach the shoe molding.
This small detail adds a professional finish and catches minor discrepancies between the floor and the baseboard.
The satisfaction I felt when I installed that last piece of molding was immeasurable – it’s the final touch that brings a room together!
Final Inspection and Clean-Up
Inspect the Installation for Any Issues
After the final piece of molding, don’t be in a rush to start moving furniture back in. Take the time to inspect everything you’ve installed thoroughly.
The first time, I was so ready to be done that I skipped this step and later found a few errors I could’ve easily fixed.
Now, I always look over the installation, paying particular attention to the molding and the transition strips.
Tips for Cleaning the Floor After Installation
This might sound silly, but remember to clean up after yourself! Post-installation, the last thing you want is to scratch your brand-new floors with leftover debris.
I usually start with a soft broom to gather large particles and follow up with a vacuum with a hard floor attachment to pick up the minor stuff.
Be gentle; remember your floors are new, and you don’t want to scuff them up.
Importance of Maintaining the Floor
Maintenance is vital to ensuring the longevity of your floors. The first time I installed a vinyl floor, I didn’t pay much attention to this and ended up with a stained and scratched surface within months.
I’ve learned my lesson, and now I clean up any spills immediately, place protective pads under furniture, and use entry mats to limit the amount of dirt tracked onto the floor.
Conclusion
From prepping the subfloor to adding the final touch with shoe molding, we’ve covered a lot of ground in this article.
Each of these nine steps is crucial to ensure a successful vinyl plank floor installation. Remember, it’s all about patience, precision, and not skipping the details.
Proper installation is the difference between a floor that lasts a few years and one that lasts a lifetime.
Look back on my first DIY flooring disaster, and you’ll understand why I place such an emphasis on doing things right.
Now, it’s time for the best part – enjoying your new floor! There’s a unique satisfaction in walking on a floor that you’ve installed yourself.
It’s not just about the money saved but also the skills and knowledge gained. So, enjoy your new vinyl plank floor, knowing that it’s not just beautiful but also built to last.