
Vinyl plank flooring, with its durability and striking aesthetics, has emerged as a popular choice for homeowners worldwide.
Not only does it replicate the upscale look of hardwood, but it also offers an economical and low-maintenance alternative.
However, to ensure its longevity and preserve its lustrous appeal, proper cleaning and maintenance become paramount.
It’s not just about keeping the floor sparkling clean; it’s about maintaining the integrity of the material.
This article will guide you through six effective cleaning methods, each tailored to address different cleaning needs and ensure your vinyl plank flooring remains pristine. Stay tuned!
1. Sweeping and Dusting
Start with Regular Dry Cleaning as the Foundation
Just as we make our beds every morning, our vinyl plank flooring requires some regular TLC too!
I’ve found that incorporating a simple habit of dry cleaning into my daily routine goes a long way in maintaining the fresh look of the floor.
The idea is to remove dust and dirt before they have a chance to settle and cause damage. A regular sweep can work wonders for your floor, trust me!
The Importance of Removing Loose Dirt and Debris
It’s easy to underestimate the damage that a little dirt can do. I remember a time when I noticed some barely visible scratches on my beautiful vinyl floor.
I was puzzled and then I realized the culprit: the tiny, sharp granules of dirt and debris that had been left to dance around on the surface!
Yes, these can act like sandpaper and dull the glossy finish of our vinyl planks. Even the smallest debris can lead to scratches that eventually cause the floor to lose its sheen.
Tips to Maximize Efficiency
- Choose a Soft-Bristle Broom or Microfiber Mop
I can’t stress enough the importance of using the right tools. A soft-bristle broom or a microfiber mop are excellent choices as they are gentle on the floor yet effective in trapping dust and dirt.
Speaking from experience, the swivel-headed type allows you to reach those tricky corners with ease!
- Sweep in the Direction of the Vinyl Plank to Avoid Scratching
One day, my neighbor gave me a smart tip that I’ve been following religiously and it has made all the difference.
Always sweep or mop along the direction of the planks. This simple trick ensures that you’re not pushing the dirt into the seams between the planks, which could cause them to lift or warp over time.
Ever since I’ve been employing these techniques, my floor has thanked me by maintaining its shine and charm!
2. Vacuuming
Never underestimate the value of a good vacuum for your vinyl plank flooring!
It’s like a magical wand that sucks up all the dirt and debris, leaving your floors in pristine condition.
Here are some reasons why I firmly believe in the benefits of vacuuming:
Benefits of Vacuuming
Vacuums are not only efficient but also incredibly versatile. They reach places your broom simply can’t – under furniture, along baseboards, and those pesky corners.
Vacuuming also saves time; what would take me an hour using a broom, a vacuum gets done in minutes!
And the best part? It removes allergens and microscopic particles that a broom would just spread around. Talk about a win-win!
Picking the Right Vacuum for Your Vinyl Plank Flooring
Not all vacuums are created equal, especially when it comes to vinyl plank flooring.
It’s crucial to choose a vacuum that respects the delicacy of your floor.
My personal go-to is a model specially designed for hard flooring. It’s gentle but effective, ensuring my floor remains undamaged yet spotless.
The Golden Rules of Vacuuming Vinyl Plank Flooring
- Use a Vacuum with a Soft Brush or Hard Floor Setting:
My vacuuming game changed completely when I discovered the soft brush attachment.
It’s gentle on the floor but tough on dirt, offering the perfect balance.
Remember, the goal is to keep the floor clean and scratch-free, not to do a number on it with harsh brushes!
- Check for Attachments or Accessories for Hard-To-Reach Areas:
You’d be surprised at how much dirt can accumulate in the smallest crevices.
My vacuum came with a crevice tool and an upholstery brush, and they’ve been absolute lifesavers.
Now, no corner is too tricky, and no spot remains unclean!
Incorporating vacuuming into my cleaning routine has been a game-changer. And with these tips, I hope it’ll be the same for you!
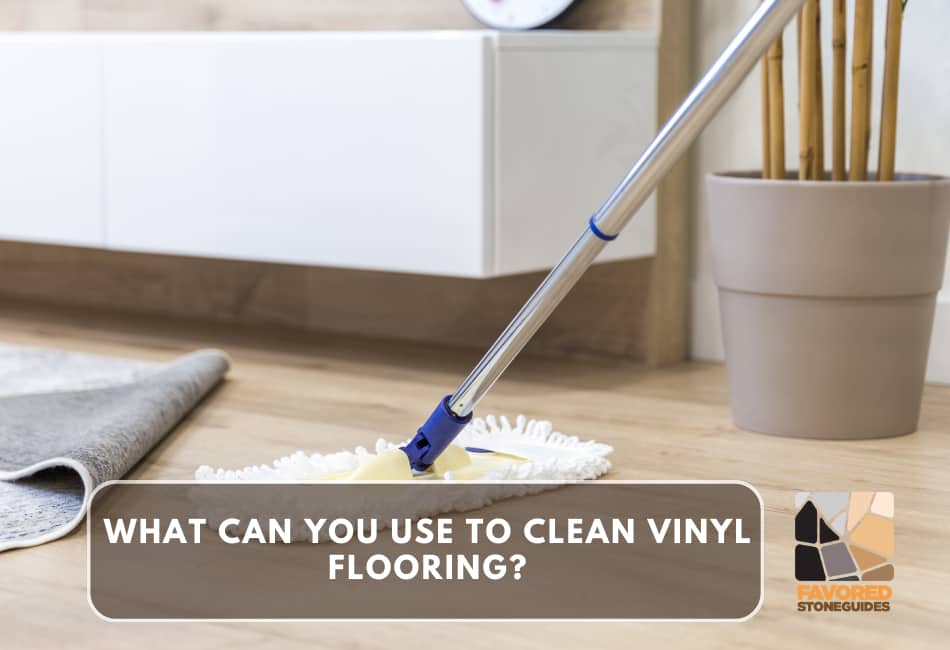
3. Mops
Now, vacuuming does a fantastic job of cleaning up dirt and debris. However, over time, your vinyl plank flooring may benefit from a deeper, more thorough clean.
This is where mopping comes in. I consider mopping to be the “spa treatment” for my floors.
It’s like a deep cleanse that leaves my floors sparkling and feeling loved.
Mopping in Deeper Cleaning
On those days, when my floor looks tired and dull, a good mopping session does wonders.
It not only helps to remove stains and ground-in dirt but also adds that extra shine.
For me, it’s the perfect finishing touch to my cleaning routine, making my floors look as good as new.
Types of Mops and Cleaning Solutions
Choosing the right mop for your vinyl plank flooring is just as important as picking the right vacuum. I’ve found that a microfiber mop works best.
It’s gentle on the floor, and its super-absorbent nature means there’s no risk of excess water damaging the flooring.
Mopping Sub-points
- Microfiber
My first piece of advice would be to use a microfiber mop. Unlike traditional cotton mops, microfiber mops don’t leave puddles of water on your precious flooring.
They absorb water very quickly, leaving the floor almost dry immediately after mopping.
Trust me, this small change in your cleaning routine can significantly prolong the life of your flooring.
- The Cleaning Solution Conundrum
When it comes to cleaning solutions, you have two options. You could either make a DIY solution at home or go for a vinyl floor-specific cleaner.
Personally, I prefer making my own solution with warm water and white vinegar. It’s a gentle yet effective option that’s perfect for my vinyl plank flooring.
However, if you’re short on time, a specialized cleaner can also do the trick. Just make sure it’s designed specifically for vinyl flooring to avoid any unwanted damage.
With these mopping tips in your arsenal, I assure you, your floors will thank you!
4. Steam Cleaning
There’s something quite satisfying about watching a steam cleaner in action.
This magical machine uses the power of heated water to break down tough stains and leave your vinyl plank flooring gleaming.
It’s like having a mini power washer at your disposal!
Steam Cleaning
If you haven’t encountered a steam cleaner before, let me introduce you.
It’s a device that heats water to create steam, which is then directed onto the surface you want to clean.
The heat of the steam effectively breaks up grime and dirt, which you can then easily wipe away.
I remember the first time I used a steam cleaner on my floors; it seemed almost too good to be true!
When and How to Use a Steam Cleaner
Now, you might be wondering when to use a steam cleaner.
While it’s not an everyday tool, it’s perfect for those deep cleaning sessions when a simple mop just won’t cut it.
The process is straightforward: fill the cleaner with water, allow it to heat up, then guide it across the vinyl plank flooring, much like you would a vacuum.
The first time I used it, I was amazed at how easy it was and how clean my floors looked!
Sub-points
- Follow the Manufacturer Guidelines
As with any device, it’s crucial to follow the manufacturer’s instructions.
These guidelines are there to keep you safe and get the best out of your steam cleaner.
The first time I used mine, I’ll admit I was a bit cavalier, thinking “How hard could it be?”
But soon realized the importance of reading the manual to avoid any mishaps!
- The Benefits of Steam Cleaning Stubborn Stains
One area where the steam cleaner truly shines is tackling those stubborn stains.
The heat from the steam breaks down even the most resistant grime, making it easier to remove.
Recall that one time when my youngest dropped a slice of pizza, cheese-side down, onto the floor.
No matter how much I scrubbed, the grease stain wouldn’t budge.
But then I used the steam cleaner, and voila! It was like the stain was never there.
Trust me, a steam cleaner can be a real game-changer for your vinyl plank floors.
5. Spot Cleaning
One element that cannot be overlooked in the journey of maintaining your vinyl plank floors is the practice of spot cleaning.
This practice has saved me more times than I can count when unexpected spills and stains happen.
The Necessity of Dealing with Spills Promptly
You might be tempted to procrastinate when a spill occurs, thinking that it can wait. I’ve learned the hard way that this is a bad idea.
Spills left unattended can seep into the crevices of your flooring, leading to long-term damage. My golden rule? Act immediately. The faster you address the problem, the less likely it is to cause a stubborn stain.
The Process of Spot Cleaning for Different Types of Stains
Stains come in all forms and sizes, and each one requires a different approach.
For liquid stains such as coffee or juice, I usually blot the spill with a dry cloth before applying a gentle cleaning solution.
For more stubborn stains like marker or lipstick, a touch of rubbing alcohol does the trick.
Sub-points
- Addressing Common Stains
We’ve all been there – a glass of red wine tips over during a dinner party or a pen bursts, leaving an ink stain on the floor.
And let’s not forget about those unfortunate pet accidents. The key to handling these common stains is to treat them as soon as possible.
I usually dampen a cloth with a mixture of dish soap and warm water for wine and ink stains, while pet accidents require an enzyme-based cleaner to eliminate odors.
- Tips for Using Baking Soda, Vinegar, or Commercial Stain Removers
There are a few heroes in my spot cleaning arsenal. Baking soda is excellent for removing stains and odors – I create a paste with water and let it sit on the stain for a few minutes before wiping it clean.
Vinegar works wonders on stubborn stains, but always dilute it with water to avoid damage to your floors.
Commercial stain removers, while more expensive, can be very effective. I have one on standby for those really tough stains that home remedies can’t handle.
Preventive Maintenance
Preventive maintenance is an integral part of preserving the integrity and beauty of your floors. As the old saying goes, “an ounce of prevention is worth a pound of cure.”
And in the case of flooring, this couldn’t be truer. By taking steps to protect your floors from the outset, you can prevent most stains and damage from happening in the first place.
The Significance of Preventive Measures
I remember the first time I installed hardwood floors in my home. They were stunning, but within a few weeks, scratches and minor stains had started to appear.
I quickly learned that the key wasn’t to become a stain-removal expert, but to prevent these issues from occurring in the first place.
Area Rugs, Furniture Pads, and Regular Inspections
Area rugs and furniture pads are more than just decorative elements; they serve a vital protective function.
They shield high-traffic areas from wear and tear, and prevent furniture from scratching your floors.
For instance, I’ve placed an area rug in my living room, which not only adds a touch of style but also protects the floor from the daily foot traffic.
Furniture pads, on the other hand, are a must under heavy furniture legs. They’ve saved my floors from countless scratches!
In addition to these protective measures, regular inspections help catch any potential issues early, before they turn into major problems.
I personally make it a point to check my floors every few weeks.
Sub-points
- Using Entryway Mats to Trap Dirt and Moisture
One of my best investments was a set of entryway mats.
Placed at each entrance of my home, they trap dirt and moisture that could otherwise end up staining or damaging my floors.
Plus, they add a nice welcoming touch to your home!
Lift Furniture, Don’t Drag
I can’t stress this enough: always lift furniture when moving it. I learnt this the hard way when I dragged a heavy desk across my room and ended up with a deep scratch on my beautiful hardwood floors.
Ever since, I make sure to lift furniture, or use felt pads or carpets to slide it across the floor. Trust me, your floors will thank you!
Conclusion
Reflecting back on the six effective cleaning methods for vinyl plank flooring; using entryway mats to trap dirt and moisture, lifting furniture instead of dragging it, frequent sweeping, using a damp mop for deep cleaning, avoiding harsh chemicals, and regular waxing.
Each method has its unique advantages and is aimed at maintaining the pristine condition of your flooring.
The importance of regular cleaning cannot be overstated. It’s not just about maintaining the aesthetic of your home, it’s about preserving your investment.
Vinyl plank flooring, while durable, is not invincible. Regular cleaning helps to prolong its lifespan, ensuring that it continues to add value and beauty to your home for years to come.
There’s no one-size-fits-all when it comes to cleaning your vinyl plank flooring. What works for me may not work for you.
You have to choose the method that suits your needs and preferences. For instance, if you have pets or small children, you’ll definitely want to consider using entryway mats to trap dirt and moisture.
So what are you waiting for? Start implementing these cleaning techniques today, and watch as your vinyl plank floor maintains its shine and beauty over time.
Remember, a little regular maintenance can save you a lot of time and money in the long run. Trust me, your floors will thank you!