
When I first decided to install laminate flooring in my home, I was attracted by its durability, aesthetics, and cost-effectiveness.
However, I quickly realized proper installation was equally important as choosing the right flooring. A poorly laid floor can cause many problems, from a reduced lifespan to aesthetic issues like bulging and gapping.
This guide is designed to prevent such pitfalls. We’ll cover everything from preparation required tools to expert installation tips.
Whether you’re a DIY enthusiast or a professional installer, you’ll find valuable information to make your laminate flooring installation successful. Let’s dive in and save you the trouble I went through on my first attempt!
Pre-Installation Preparation
Pre-installation preparation is one of the most overlooked aspects of laminate flooring installation.
Trust me, I learned this the hard way. I once thought I could skip this stage and start laying my laminate planks.
I was sorely mistaken. I had to tear everything up and start over again because of unevenness and moisture issues.
Checking for Moisture and Evenness
Preparing your subfloor is vital to a successful installation. Start by checking for any moisture issues. Laminate flooring doesn’t play well with moisture, and if your subfloor is damp, it can warp and buckle the laminate.
Use a moisture meter to measure the moisture level of your subfloor. If the levels are high, you might need to postpone your installation or seek professional help.
Addressing Existing Flooring or Subfloor Issues
A flat, even surface is critical for the longevity and aesthetics of your laminate floor. Look for any damage or uneven areas on your existing flooring or subfloor.
If you find any, they must be addressed before laying your laminate. Remember, an uneven subfloor can lead to a squeaky floor and premature wear and tear.
Subfloor Preparation Steps
1. Cleaning the Subfloor Thoroughly
Before installing your laminate flooring, ensure the subfloor is clean and free from dust, dirt, and debris. A clean subfloor ensures a smoother installation process and a more secure fit for your laminate planks.
2. Repairing Any Damaged Areas
If your subfloor has damaged areas, it is time to repair them. Get it fixed, whether it’s a crack, a hole, or a bump. This might involve sanding down high spots or filling in low spots with a floor-leveling compound.
3. Installing a Moisture Barrier if Necessary
If your subfloor is concrete or you’re installing over a crawl space, a moisture barrier is a must. This thin layer of plastic or felt will help prevent moisture from seeping into your laminate flooring.
Acclimating the Laminate Flooring to the Room’s Environment
Finally, don’t forget to acclimate your laminate flooring to your room’s environment. This involves unboxing the laminate and letting it sit in the room for at least 48 hours before installation.
This process allows the laminate to adjust to the room’s temperature and humidity levels, which reduces the risk of contraction and expansion after installation.
In my experience, ignoring this step led to unsightly gaps between the planks. It was a mistake I paid dearly for, so I urge you not to repeat it!
Gathering the Necessary Tools and Materials
The right tools and materials can make your laminate flooring installation process far smoother. Here’s the essential kit you’ll need:
- Laminate Flooring Planks: Ensure you have enough to cover your room area, plus an additional 10% to allow for cuts and errors.
- Underlayment: This layer provides cushioning and sound absorption, and it’s vital in installations over concrete or below-ground levels.
- Tape Measure and Pencil: Precision is key to a successful installation. A good, reliable tape measure and pencil are indispensable for marking your cutting lines accurately.
- Saw (Circular Saw or Jigsaw): You’ll need this to cut your laminate planks to the correct size. A circular saw is great for straight, clean cuts, whereas a jigsaw is perfect for more intricate cuts, like around door frames.
- Spacers: These help maintain a consistent expansion gap between the flooring and the wall during installation.
- Tapping Block and Hammer: These tools gently tap planks into place without damaging them.
- Utility Knife: Handy for cutting the underlayment and trimming excess materials.
- Safety Gear (Gloves, Eye Protection, Knee Pads): Safety is paramount, so always equip yourself with the necessary protective gear.
Many of these tools and materials can be purchased at home improvement stores. Many stores offer tool rental services if you don’t want to buy a saw for a single job. Alternatively, consider borrowing from a friend or neighbor.
I remember when I first installed laminate flooring in my own home. I could get by without a tapping block and instead used a piece of scrap wood—bad move.
The wood splintered, damaging the edge of my brand-new laminate plank. Lesson learned: the right tools make all the difference!
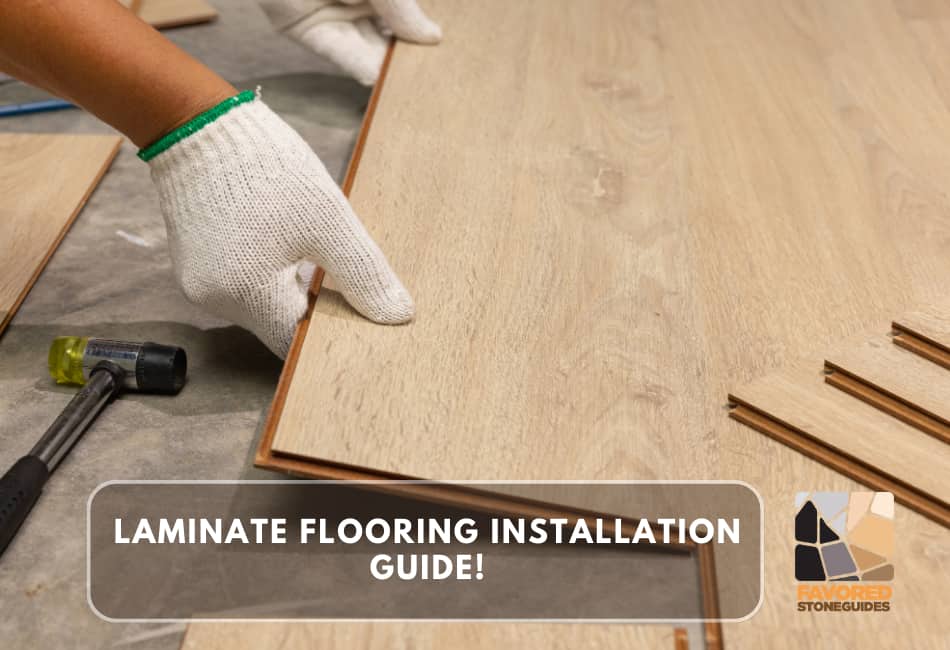
Installing Laminate Flooring: Step-by-Step
Step 1: Starting Point
- Choosing the right starting wall is critical for a smooth installation process.
- It’s best to start from an exterior wall as they’re usually the straightest.
- Be sure to measure and mark your guidelines accurately.
- I recall neglecting this step, resulting in a misaligned first row that threw off the entire room!
Step 2: Underlayment Installation
Underlayment is easy to install.
- Unroll and secure it across the room, ensuring the edges don’t overlap to prevent unevenness.
- It’s important to tape all seams to prevent moisture from seeping through.
- I always have a roll of tape handy – you’ll be surprised how fast you run out!
Step 3: First Row Installation
- Install the first row of laminate planks, ensuring proper spacing from the wall with the help of spacers.
- I remember installing the first row too close to the wall once, and the planks ended up buckling due to expansion.
- Always remember to leave an expansion gap!
Step 4: Subsequent Row Installation
- Subsequent rows of planks need to be interlocked, maintaining proper staggered joints.
- This technique enhances the flooring’s strength and visual appeal.
- After a few rooms, you’ll be staggering joints like a pro!
Step 5: Cutting Laminate Planks
- When you encounter obstacles like door frames and vents, measure and cut the planks to fit.
- Precision is key here. I’ve found that a sharp utility knife or a fine-toothed jigsaw does the trick for most cuts.
Step 6: Final Row Installation
- Your final row might require you to cut the planks lengthwise. Don’t fret; take your time to measure and cut.
- Be sure the final row fits snugly but with enough room for expansion.
- It’s a delicate balance, but you’ll get the hang of it.
Step 7: Installing Moldings and Trim
- Once your laminate is laid down, it’s time to install baseboards and transition strips.
- These cover the expansion gaps and add a finished look to your room.
- Caulk and fill any remaining gaps, and remember not to fasten any trim pieces to the flooring itself – it needs room to expand and contract.
Step 8: Finishing Touches
- Wrap up by removing spacers and giving your new floor a good clean.
- Seeing your beautiful, perfectly installed laminate floor for the first time is a moment to savor.
- I still remember how rewarding it felt after installing my first laminate floor.
Tips for a Successful Installation
To ensure a successful installation, here are a few additional tips and tricks:
Maintaining Proper Expansion Gaps
Never overlook the importance of maintaining proper expansion gaps. Laminate planks expand and contract with changes in temperature and humidity.
Failing to leave room for this can lead to buckling and damage. In my early days as a novice installer, I had to redo an entire room due to this oversight!
Handling Tricky Areas
Doorways, closets, and corners can be challenging during installation. I recommend using a contour gauge for door frames to trace the shape and cut the plank accordingly.
For corners and closets, always measure twice and cut once. Patience and precision are crucial here.
Checking for Imperfections and Addressing Them
Before laying your planks, thoroughly inspect the subfloor for any imperfections. Any bumps or dips can cause problems with your laminate.
I once had a floor that made a mysterious clicking sound every time I walked on it – turns out, there was a tiny pebble under the plank.
Maintaining a Consistent Pattern
Keeping a consistent pattern is key to a visually pleasing floor. Always stagger your joints and remember to mix planks from different boxes for a variegated effect.
Checking for Squeaks and Addressing Them
Finally, always check for squeaks. If a plank makes a noisy protest when you step on it, it’s usually an indicator of an uneven subfloor or insufficient underlayment.
There’s nothing more annoying than a squeaky floor – trust me, I learned this the hard way.
Remember, with a bit of patience and practice, you can install a laminate floor that will last for years and add value to your home. Happy installing!
Maintenance and Care Guidelines
A well-installed laminate floor can look great for years, but only with proper care and maintenance.
Regular sweeping or vacuuming can prevent grit and dirt from scratching the surface.
Be sure to use a damp mop instead of a wet one, as excessive water can cause damage.
For stubborn stains, I personally use a mild detergent diluted with water, and it works like a charm.
Remember, the ultimate goal is to retain the beauty of your laminate floor.
Conclusion
In conclusion, installing laminate flooring is an art and a science, requiring careful planning, precise measurement, and diligent execution.
From the initial stages of selecting the right materials to the final steps of checking for imperfections and addressing them, each phase is crucial to achieving a beautifully installed floor.
Taking your time is okay, and there’s no shame in seeking professional help if needed. After all, a well-installed floor doesn’t just enhance the aesthetic value of your home, it also ensures longevity.
My journey in flooring installation has taught me one thing – the beauty of a floor lies as much in the details of its installation as it does in the material itself.
Good luck with your installation, and may your new floor bring you joy for years to come!