
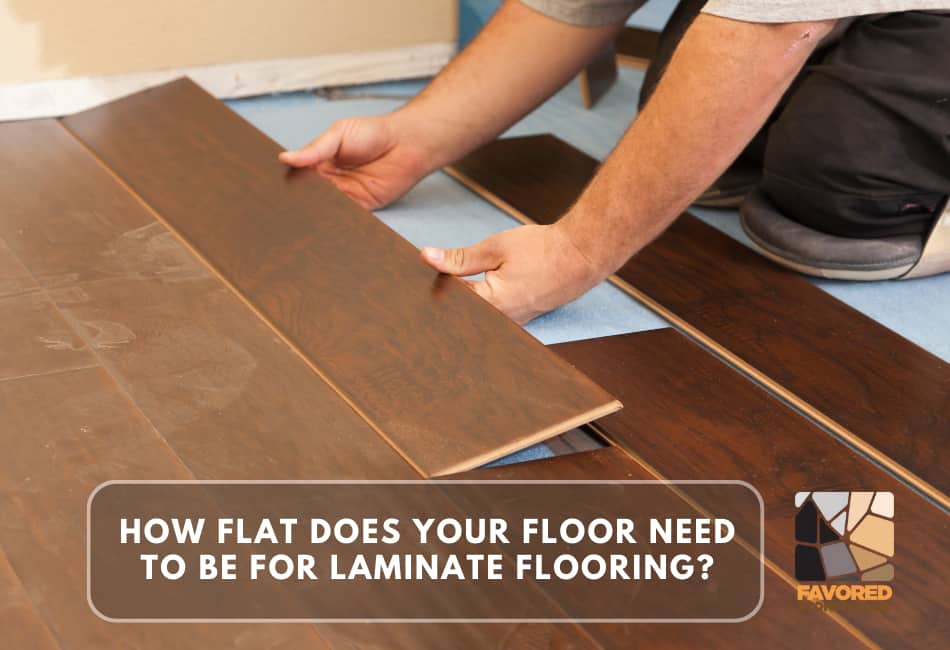
Laminate flooring, known for its aesthetic appeal and durability, demands a flat, level surface for optimal installation.
The significance of a level surface cannot be overstated: it not only ensures a smooth finish but also plays a crucial role in maintaining the longevity of your laminate flooring.
An uneven floor can lead to unsightly gaps and bumpy surfaces. Over time, the constant stress on the laminate can result in wear and tear, compromising its durability and visual charm.
With this in mind, this blog post aims to dive deep into the importance of a flat floor when installing laminate flooring.
We’ll explore the ramifications of an uneven floor and provide practical advice to ensure a level base for your laminate.
Stick with us as we guide you through the essentials to consider before you embark on your laminate flooring project.
Understanding Laminate Flooring
Laminate flooring is a popular choice for many homeowners due to its striking similarity to natural hardwood, yet with greater affordability.
Crafted from composite wood pressed together at high temperatures, laminate flooring has a photographic applique under a clear protective layer that can mimic the aesthetic of any hardwood species.
Benefits of Laminate Flooring
The appeal of laminate flooring extends beyond its visual charm. It’s known for its durability, resistance to scratches, and ease of maintenance, making it a perfect choice for high-traffic areas in your home.
Furthermore, laminate flooring offers an eco-friendly option as it uses less natural wood in its construction.
Technological advancements allow you to find water-resistant laminate options suitable for kitchens and bathrooms.
Factors Influencing Its Installation
Several factors influence the installation process of laminate flooring. One of the most critical aspects is the condition of the subfloor.
It must be flat, dry, and clean to install the laminate correctly. Other factors include the room’s size and shape, the type of laminate chosen, and the installation method used.
Remember, a poorly installed laminate floor can lead to complications like buckling, gaping, or even damage to the floor itself over time.
Assessing Your Subfloor
Before installing your laminate flooring, it’s crucial to understand and assess your subfloor.
What is a Subfloor?
A subfloor is the foundational layer over which your decorative flooring layer — in this case, laminate — is placed.
This surface is usually made of concrete, plywood, or OSB (Oriented Strand Board), and its condition greatly influences the durability and appearance of your final floor.
Importance of a Level Subfloor
The importance of a level subfloor cannot be overstated. An uneven subfloor can lead to various issues with the laminate flooring, such as buckling or movement when walked upon.
It can also lead to premature wear and tear. Thus, ensuring a level and clean subfloor is vital in the laminate flooring installation process.
Common Types of Subfloor Materials
There are several common types of subfloor materials used in homes:
- Concrete: Concrete is a durable and stable material often used on ground-level floors and basements. However, it needs to be sealed properly to prevent moisture damage.
- Plywood: Plywood is a common choice for subfloors in residential homes. It’s strong, easy to work with, and provides a stable base. Plywood can be susceptible to water damage, so it’s crucial to ensure it’s adequately protected.
- OSB (Oriented Strand Board): OSB is engineered wood similar to particle board. It’s popular due to its affordability and resistance to moisture and warping.
Tools and Equipment for Subfloor Inspection
When examining your subfloor, you’ll need a few essential tools: a level to check for flatness, a moisture meter to determine the moisture content, and a pry bar or scraper to remove any old adhesive or residue.
Remember, a detailed subfloor inspection can save you time and money in the long run by helping you avoid potential flooding issues.
Flatness Tolerance for Laminate Flooring
Laminate flooring necessitates a mainly flat subfloor to ensure a smooth and durable finish.
It’s essential to understand the industry standards, acceptable range, and the impact of irregularities for floor flatness in the context of laminate flooring.
Industry Standards for Floor Flatness
The industry standard for floor flatness when installing laminate flooring is that the subfloor should not have more than a 3/16 inch difference in height within a 10-foot radius.
This standard ensures a uniform and stable surface for your laminate floor.
Defining the Acceptable Flatness Range
The acceptable flatness range for laminate flooring, in line with the industry standard, means that any dip or bump on your subfloor that is more than 3/16 inches over a 10-foot span could potentially cause issues with your laminate flooring.
This range provides a balance that allows for minor, unavoidable variations without compromising the integrity of your flooring.
Impact of Subfloor Irregularities on Laminate
Subfloor irregularities can lead to various issues with your laminate flooring.
They can cause the laminate to move or shift when walked upon, create a hollow sound, or even lead to cracking and buckling over time.
It’s, therefore, crucial to ensure your subfloor conforms to the flatness tolerance.
Measuring Floor Flatness
To measure floor flatness accurately, a few essential tools are required.
- Using a Straightedge: A straightedge is used to identify any bumps or dips in your subfloor. You can easily spot any irregularities outside the acceptable range by laying it across the surface.
- Laser Level: A laser level can also be an efficient tool to check the flatness of your subfloor. It projects a perfectly straight line onto your floor, exposing any deviations.
- Spirit Level: A spirit level is a valuable tool in checking the overall level of your subfloor. It can help ensure your floor doesn’t slope and highlight potential problem areas.
Preparing Your Subfloor
Your subfloor must be adequately prepared to ensure a flat and stable surface for your laminate flooring. This preparation involves several steps:
Steps to Level a Subfloor
- Surface Cleaning: The first step in preparing your subfloor is thoroughly cleaning the surface. It involves removing any dirt, dust, or debris that could interfere with the leveling process.
- Filling Cracks and Holes: Inspect your subfloor for cracks or holes after cleaning. These can be filled using a suitable filler. Always ensure the filler is fully cured before moving to the next step.
- Sanding High Spots: If there are high spots in your subfloor, they need to be sanded down. Use coarse-grit sandpaper for this task, and always wear protective gear to safeguard yourself from dust and debris.
- Applying Leveling Compound: Finally, a leveling compound can be applied to any low spots in your subfloor. This compound will fill the dips and create a flat, even surface for your laminate flooring.
Proper Subfloor Moisture Content
When preparing your subfloor, it’s crucial to consider the moisture content of the subfloor as well.
A subfloor with high moisture content can warp or rot, damaging your laminate flooring over time.
Use a moisture meter to assess the subfloor’s moisture content, and if it’s too high, consider using a dehumidifier or wait for it to naturally dry out before installing your laminate flooring.
Addressing Squeaky or Loose Subfloors
If your subfloor is squeaky or loose, it could lead to movement and noise under your laminate flooring.
This issue can be addressed by securing the subfloor to the joists below using screws.
If the problem persists, you might need to replace subfloor sections to ensure the stability and longevity of your laminate flooring.
Correcting Subfloor Issues
Correcting subfloor issues is critical to a successful application when installing laminate flooring. Here are a few common issues and their solutions.
Dealing with Uneven Concrete Subfloors
Uneven concrete subfloors are a common issue that can be solved using a concrete grinder to smooth out high spots.
For low spots or dips, a self-leveling compound can be applied. Ensure the compound is fully dried and cured before installing the flooring.
Leveling Plywood or OSB Subfloors
Plywood or Oriented Strand Board (OSB) subfloors may present different challenges. High spots can be sanded down using a belt or drum sander.
Low spots, on the other hand, can be leveled using a suitable patching compound. Ensure the compound is appropriately mixed to achieve the right consistency and allow adequate time for drying.
Subfloor Alternatives and Considerations
If your existing subfloor is unsuitable for laminate flooring installation, alternatives are available. Engineered wood or cement board are viable options that provide a stable and even surface.
When choosing an alternative, consider your geographical location, the humidity level, and the room’s intended use.
Always ensure that the subfloor alternative aligns well with the manufacturer’s recommendations to maintain the warranty of your laminate flooring.
VII. Hiring a Professional vs. DIY
When considering a laminate flooring installation, you may find yourself debating between hiring a professional or attempting a Do-It-Yourself (DIY) project. Both options come with their own advantages and considerations.
Hiring a Professional Installer
Employing a professional installer for your laminate flooring can offer many benefits. First and foremost, professionals possess the experience and technical skills to handle unexpected issues, ensuring a high-quality finish.
A professional installation can be more efficient, saving you time and potentially mitigating costly mistakes.
Additionally, professionals often provide warranties for their work, offering you added peace of mind.
DIY Considerations
On the other hand, DIY installation can be a rewarding project for those up for the challenge. It allows you to control every aspect of the process and can be a more cost-effective solution.
However, being aware of the necessary tools, skills, and time investment is essential.
Mistakes can lead to additional expenses, and you’ll need to ensure adherence to the flooring manufacturer’s installation instructions to maintain the product warranty.
When to Consult an Expert
While DIY can be a viable option for many, knowing when to call in the experts is crucial. Complexities such as uneven subfloor, humidity control, or a large installation area may necessitate professional guidance.
If you’re unsure or uncomfortable at any stage of the installation, don’t hesitate to consult a professional to avoid unnecessary setbacks or damage to your flooring.
Conclusion
In conclusion, choosing between hiring a professional installer for your laminate flooring or taking on a DIY project depends on several factors.
Recap of Key Points
Professional installers bring expertise and efficiency to the table, ensuring a high-quality finish while saving time and potentially avoiding costly errors.
They also often provide warranties for their work, adding an extra layer of security. On the other hand, a DIY installation allows for complete control over the process and can be more cost-effective. Still, it requires understanding the necessary tools, skills, and time investment.
Mistakes can lead to additional expenses, and adherence to the manufacturer’s installation instructions is vital to maintaining the product warranty.
The Significance of a Flat Subfloor for Laminate Flooring
One crucial aspect to consider, whether you’re going DIY or hiring a professional, is the importance of a flat subfloor for laminate flooring.
An uneven subfloor can lead to issues like creaking, movement, and even overall failure of the flooring system.
It’s essential that the subfloor is adequately prepared and inspected for flatness before the installation of laminate flooring begins.
Encouragement for Homeowners to Ensure Proper Subfloor Preparation
As a homeowner, ensuring your properly prepared subfloor can distinguish between a beautiful, long-lasting floor and one that succumbs to issues down the line.
Don’t underestimate the importance of this step, even if it means consulting a professional to ensure it’s done correctly.
Final Thoughts on Achieving a Beautiful and Long-Lasting Laminate Floor
Ultimately, the effort invested in ensuring a proper installation – whether done professionally or as a DIY project – will pay off in a beautiful and long-lasting laminate floor.
Remember, it’s not just about the aesthetic; a well-installed laminate floor can add value to your home, making it a worthwhile investment.