
Whether you’re a seasoned DIY enthusiast or a homeowner embarking on your first home improvement project, understanding the intricacies of floor installations can make a significant difference in the lifespan and quality of your flooring.
One such crucial aspect is underlayment, particularly when installing vinyl flooring on plywood.
This underlayment, often overlooked, can provide sound insulation, smooth out minor subfloor imperfections, and even extend the life of your vinyl flooring.
In this blog post, we’ll delve into the importance of underlayment, explain whether you need it for vinyl flooring on plywood, and provide guidelines to make your flooring project a resounding success.
Advantages of Using Underlayment
Primary Benefits of Using Underlayment
1. Improved Cushioning and Comfort Underfoot
One of the first things I noticed when I installed underlayment under my vinyl flooring was the sheer difference in comfort.
Walking barefoot on the floor was no longer a hard and cold experience.
The underlayment added cushioning that made every step softer and more comfortable, much like the feeling of walking on a lush, well-maintained lawn.
2. Enhanced Moisture Protection and Insulation
Living in an area that experiences high humidity levels, I was concerned about the potential for moisture damage to my plywood subfloor.
Surprisingly, the underlayment acted as a moisture barrier, repelling water and protecting my subfloor from potential dampness.
Additionally, it provided an added layer of insulation, keeping my floors warmer in the winter and cooler in the summer.
3. Noise Reduction
As a music enthusiast, the noise reduction benefit was a game-changer.
I noticed a significant reduction in sound transmission – the thumping sound my feet made when hitting the floor was greatly diminished.
This made midnight snack runs less noticeable and significantly reduced my downstairs neighbor’s complaints about the noise!
4. Smoother Surface for Vinyl Installation
Beyond these direct benefits, underlayment played a crucial role in smoothing out the minor imperfections of my plywood subfloor.
When I embarked on my DIY flooring project, I was concerned about the uneven spots on my plywood.
But once I laid down the underlayment, it bridged the gaps and created a flawless, smooth surface for my vinyl flooring.
This not only made the installation process more accessible but also resulted in a more professional-looking finish.
Trust me, the difference underlayment made was like night and day!
Considerations for Skipping Underlayment
While underlayment has proven to be a game-changer in my DIY flooring project, there exist scenarios where underlayment may not benefit significantly.
Here are a couple of situations where you might consider skipping it:
- When Installing Vinyl Flooring in Dry, Climate-Controlled Environments
If you’re in a region with low humidity and have efficient climate control systems, you may not need the added moisture protection of underlayment.
For instance, when I helped my cousin install vinyl flooring in his apartment in the arid Southwest, we didn’t bother with underlayment.
The apartment’s air conditioning system maintained an ideal, low-humidity environment that mitigated moisture concerns.
- Over Well-prepared, Smooth Plywood Surfaces
Underlayment is excellent for leveling out minor surface imperfections, but if your subfloor is already in excellent condition, you might not need it.
During a recent remodel of my office, I discovered the plywood underneath was surprisingly smooth and even.
We decided to skip the underlayment, and the vinyl flooring still looked fantastic!
- Potential Cost Savings by Skipping Underlayment
The prospect of cost savings is another reason you might consider skipping underlayment. Underlayment materials and installation aren’t cheap.
Depending on the quality and type of underlayment, costs can add up quickly, especially for larger areas.
When I was flooring my large living room, I did consider for a moment skipping the underlayment to save some bucks.
However, after weighing the potential long-term benefits, I decided the investment was worth it.
But if you’re on a tight budget or in one of the scenarios above, going without underlayment might be a viable option.
Types of Underlayment Materials
A. There are various underlayment materials available for vinyl flooring, each with unique qualities that cater to specific needs.
Let me walk you through some of them from my well-rounded experience in flooring.
1. Cork Underlayment
My first encounter with cork underlayment was when I was helping my friend renovate his old farmhouse.
We chose cork because it’s a natural, eco-friendly material that offers excellent sound reduction — a feature that immediately appealed to him due to his boisterous young children.
Cork underlayment also provides thermal insulation, making it a perfect choice for homes in colder regions.
2. Foam Underlayment
When installing vinyl flooring in my summer house, I decided to go for foam underlayment.
The primary reason was its superb shock absorption and comfort underfoot.
After long walks on the beach, the added comfort was a real treat.
It’s also relatively inexpensive compared to other underlayment types, making it a great choice if you’re on a tight budget.
3. Plywood Underlayment
During a recent project in a high-traffic commercial area, we opted for plywood underlayment.
Its strength and durability are unmatched, standing up to heavy foot traffic without trouble.
Plywood also provides a smooth and level surface, ensuring the vinyl flooring on top looks its best.
Each underlayment material comes with its qualities and is best suited to particular circumstances.
For instance, cork underlayment is excellent for high-noise environments and cold regions, foam is great for comfort and budget-friendliness, and plywood is the go-to for high-traffic areas due to its durability and smooth finish.
Your choice should depend on your specific needs and the conditions you’re working with.
Installation Guidelines for Plywood Subfloor
Preparing a Plywood Subfloor for Vinyl Flooring
1. Ensuring the Subfloor is Clean, Level, and Free from Imperfections
In my experience, one of the crucial steps in preparing a plywood subfloor for vinyl flooring is ensuring the surface is clean, level, and free from any imperfections.
This step reminds me of a project I undertook where overlooking this seemingly minor detail led to noticeable bumps in the finished product.
I learned that even a tiny piece of debris can cause trouble. So, before installing the vinyl, sweep and vacuum your subfloor thoroughly, checking for any nails or screws that may be sticking up and sanding down any high spots.
2. Addressing Any Existing Moisture Issues
Moisture issues can be a real spoiler when installing vinyl flooring. I learned this during a basement renovation project.
The humidity led to mold growth under the vinyl, causing a costly and time-consuming redo.
Now, I always recommend using a moisture meter to check the plywood subfloor’s moisture content.
If necessary, use a dehumidifier to dry out the room before installation.
Acclimating Both the Vinyl and Underlayment
Allow me to share a story that underlines the importance of acclimating the vinyl and the underlayment.
When working on a project in an old cottage, I decided to skip acclimating the materials due to time constraints— a decision I’d soon regret.
The flooring ended up expanding and buckling, turning an otherwise perfect installation into a disaster.
Since then, I have always stressed the importance of giving both the vinyl and underlayment time to acclimate to the room’s temperature and humidity levels, ideally for 24-48 hours before installation.
The extra time this process takes will save you a lot of hassle.
Steps for Installing Vinyl Flooring with Underlayment
There’s a certain satisfaction that comes with installing your flooring—especially when the job’s done right.
Here’s a step-by-step guide to installing vinyl flooring over underlayment, peppered with some personal anecdotes and tips along the way.
Step-by-step Guide
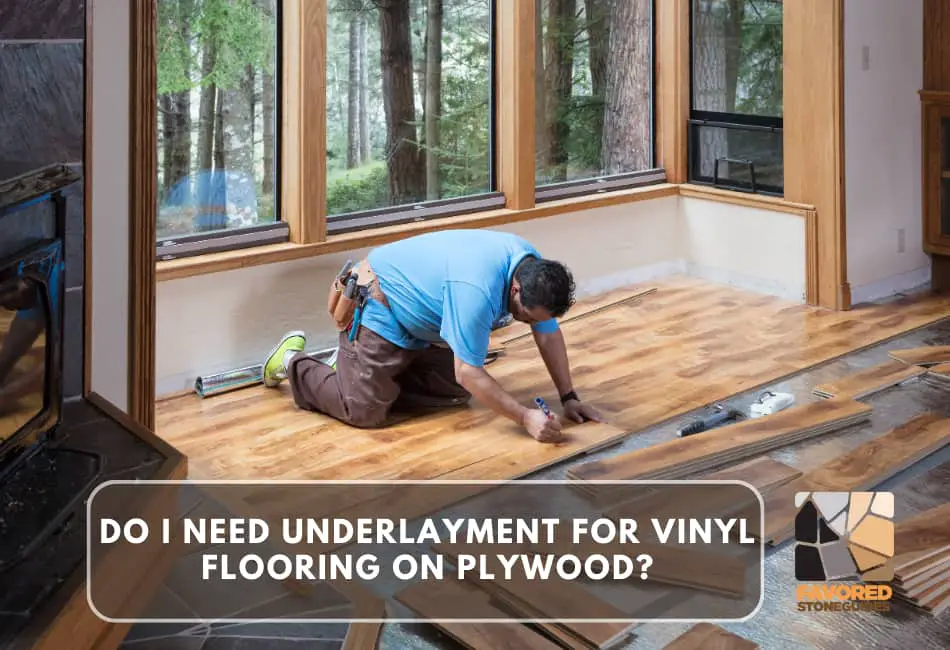
1. Cutting and Laying the Underlayment
One project that sticks with me involved a large, irregularly shaped room.
I made the mistake of not taking precise measurements, which led to the underlayment that didn’t quite fit and a lot of wasted material.
So, my first tip is to measure your room carefully and cut your underlayment to fit.
Begin by laying the underlayment in rows across the room, making sure the pieces fit together tightly without overlapping.
Tape the seams together to keep them in place.
2. Installing the Vinyl Flooring on Top
Once your underlayment is in place, start laying down your vinyl flooring.
Start from one end of the room and work your way towards the other end, making sure each piece is snug against the next.
A particular project comes to mind where I rushed this part, resulting in gaps between the vinyl pieces.
Not only did it look unsightly, but it also allowed moisture to seep in.
So, I cannot stress enough—take your time and ensure each piece fits perfectly against the next.
Tips for a Successful Installation
Remember, preparation is key. Ensure your subfloor is clean, level, and dry before beginning.
Invest in a good quality underlayment—it can make a difference in the result.
And finally, don’t rush. Take the time to acclimate your materials, cut accurately, and fit your flooring carefully.
You’ll be walking on a beautiful new floor before you know it!
Maintenance and Care
Maintaining your newly installed vinyl flooring is crucial for its longevity and aesthetic appeal. Here are some personal tips and tricks I’ve learned along the way:
Tips on How to Maintain Vinyl Flooring Over Plywood
1. Cleaning and Care Recommendations
Keeping your vinyl flooring clean is the first step towards maintaining it. But, you might ask, what’s the best way to clean it?
I once made the mistake of using a harsh floor cleaner on my vinyl flooring, damaging the glossy finish.
So here’s my advice: stick to a mild floor cleaner and a soft, damp mop for routine cleaning. Also, dry the floor afterward to prevent water from seeping into the seams.
2. Dealing with Potential Issues
Even with meticulous care, you might encounter issues with your vinyl flooring. For instance, I remember noticing a small scratch on my floor.
Instead of panicking, I used a sealer designed for vinyl floors to fill and protect the area. For more giant tears, you might need to replace a section of the floor.
Always keep some spare vinyl pieces for such times. Remember, the key to dealing with potential issues is to address them as soon as they appear to prevent additional damage.
Properly caring for your vinyl flooring can keep it looking new and extend its lifespan.
It involves regular cleaning, prompt attention to any issues, and the use of appropriate cleaning and repair products. It’s a small investment of time that will pay off in the long run.
Conclusion
Reflecting on the journey we’ve embarked on in this post, we’ve covered the ins and outs of maintaining vinyl flooring installed over plywood.
We’ve discussed the importance of selecting the right cleaning products, like a mild floor cleaner and using a gentle approach with a soft and damp mop.
We’ve also addressed how to react quickly and appropriately to scratches and tears. I’ve shared my personal experiences with these issues to help you navigate them more quickly should you encounter similar situations.
I want to underscore the importance of a solid plywood underlayment in a successful vinyl flooring installation.
From my experience, the bedrock ensures your vinyl flooring not only looks great but also stands the test of time.
It’s one of those things you might not think about at first, but if ignored, it can lead to complications. So, don’t overlook this crucial step!
Ultimately, the choice is yours. I’ve shared my experiences and the lessons I’ve learned from them, but every home and every installation is unique.
What works for me might not work for you, and vice versa. I hope that by sharing my journey, I’ve equipped you with the knowledge and confidence to make the best choices for your vinyl flooring installation.
Remember, it’s not just about making your home look good – it’s about ensuring it is a safe, comfortable, and beautiful place for you and your loved ones to enjoy.