
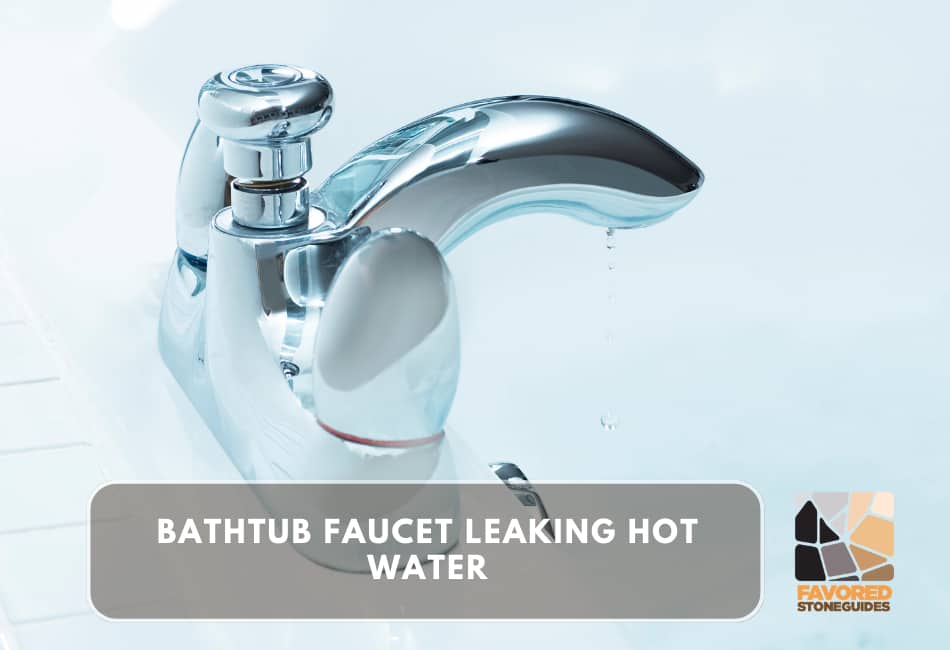
A bathtub faucet leaking hot water is a common yet frustrating household issue.
This guide promises to delve into the potential causes and fixes, emphasizing the significance of swift action to avoid escalating water bills and prevent potential damage to your home.
Stay tuned to gain insights into managing and preventing this often-overlooked problem.
Problem Overview
- The Nitty-Gritty of a Leaking Bathtub Faucet
Let me tell you, nothing quite matches the annoyance of a persistently dripping faucet, especially when it’s hot water.
It’s like a constant hum in the background of your life, always there, constantly nagging. But it’s more than just an annoyance.
A bathtub faucet leaking hot water means your water heater is working overtime, wasting energy and causing utility bills to skyrocket.
- The Consequences of Turning a Blind Eye
I once thought, “It’s just a few drops. How bad could it be?” Well, let me tell you—it’s terrible.
Every drop of hot water your faucet leaks is heated on your dime straight down the drain.
Over time, that adds up. You’re not just wasting water, you’re wasting energy and money.
And let’s not forget about the potential damage to your home.
That constant moisture can lead to mold, mildew, and even structural damage if neglected.
- The Timeliness of the Solution
I’ve learned the hard way that time is of the essence regarding leaks. The faster you act, the more money and resources you save.
They say a stitch in time saves nine, and it’s true. If you notice your bathtub faucet leaking hot water, don’t dilly-dally. Address it promptly to protect your wallet, your home, and our precious resources.
Causes of Hot Water Leakage
1. Worn-out or Damaged Washer
Believe it or not, the tiny washer in your faucet carries a big responsibility. It’s a crucial part of the mechanism that controls water flow.
When it wears out or gets damaged, a leak will follow. One time, I replaced a washer, and the leak stopped instantly. It was as if I had performed some magic trick!
2. Corroded Valve Seats and Seals
I once dealt with a leak that wouldn’t quit, even after replacing the washer. Upon closer inspection, I discovered the valve seats and seals had corroded.
The faucet couldn’t close properly, resulting in that dreaded constant drip. A new set of valves and seals fixed the issue.
3. Loose or Damaged Parts in the Faucet Assembly
If not for a friend’s attentiveness, I might have replaced an entire faucet unnecessarily.
He noticed a loose part in the faucet assembly, and after a bit of tightening, the leak was no more.
Always remember every part of the assembly counts.
4. High Water Pressure Issues
Once, I woke up in the middle of the night to a dripping faucet. To my surprise, the faucet was fine during the day.
I later found out that the water pressure in my house was too high, especially at night when usage was low.
High water pressure can force water past the washer, causing a leak.
5. Improper Installation or Previous Repair Work
I learned that a DIY repair job might not always be the best solution.
After an unsuccessful repair attempt, I called in a professional who told me my faucet had been improperly installed.
The mistake had caused the leak, and the pro’s correct installation swiftly solved the problem.
6. Temperature Adjustment Problems
Last winter, I struggled with a peculiar leak that only occurred when I adjusted the water temperature.
After much research and frustration, I discovered that the temperature control was faulty, causing a leak whenever I tried to get the water just right. Replacing this part fixed the issue.
Potential Fixes
Washer Replacement
If you’re anything like me, you want to try fixing things independently. Replacing a washer is often a simple DIY solution for a dripping faucet. Here’s a quick step-by-step guide based on my own experience:
- First, turn off the water supply to your faucet. Forgetting this step once led to a minor flood in my kitchen!
- Now, remove the handle of the faucet and the packing nut, revealing the stem. Remove that as well, and you’ll find the washer.
- Inspect the washer. You’ll need to replace it if it’s damaged or worn out – which was the case in my first-ever faucet repair job.
- Take the old washer to the hardware store and find an identical match. This is crucial. The wrong size or type of washer won’t seal properly. I learned this the hard way.
- Install the new washer and reassemble the faucet and handle.
Valve Seat and Seal Replacement
Sometimes, the valve seat and seals on your faucet may corrode or wear out – this was the culprit behind the second faucet leak I experienced. Here’s how you can go about replacing them:
- After shutting off the water supply, remove the handle of the faucet and the packing nut, which will expose the stem.
- At the bottom of the stem, you’ll see the valve seat. You’ll need to replace it if it’s corroded, like mine.
- To remove the valve seat, you’ll need a seat wrench. Insert it into the seat and turn counterclockwise.
- Once removed, bring it to the hardware store to find an identical replacement.
- Install the new seat by turning it clockwise with your seat wrench, then replace the stem and handle.
Tightening or Replacing Loose Parts
A loose part within the faucet assembly can sometimes cause a leak. A friend spotted this issue for me; a simple tightening job did the trick. Here’s what you should look for:
- After removing the handle and packing nut, inspect the stem. If it wobbles, this could be your problem.
- Using a wrench, tighten the packing nut on the stem. If the item is still wobbly, you may need to replace it.
- If the stem needs to be replaced, remove it by twisting it counterclockwise and bring it to your hardware store to find a suitable replacement.
- Install the new stem by twisting it clockwise, then replace your handle.
Regulating Water Pressure
If your faucet leaks erratically, it may be due to high water pressure, as I discovered during one sleepless night. Maintenance of ideal water pressure is crucial to prevent such leaks:
- You can test your water pressure with a pressure gauge. If the reading is between 30-80 psi, it’s in the ideal range.
- If the pressure is too high, you may need to install a pressure-reducing valve, which is a job I decided to leave to the professionals.
Seeking Professional Help
Lastly, don’t hesitate to seek professional help if the problem seems beyond your expertise.
After a failed attempt to fix a tricky leak, I called in a plumber who identified the issue as an improperly installed faucet.
Sometimes, the best solution is to let the pros handle it.
DIY vs. Professional Repair
In the world of home improvements, the decision to tackle a project yourself or to call in a professional can be pretty challenging. Here’s my take on it based on my experience with faucet repairs:
Advantages of DIY Repairs
- Cost Savings and Self-Sufficiency:
The most apparent advantage of DIY repairs is the potential cost savings. When I fixed a minor leak in my bathroom sink, I spent only a fraction of what a plumber might have charged me.
Additionally, a great sense of satisfaction comes with fixing something with your own two hands. It instills a sense of self-reliance that’s quite invigorating.
Situations Where Professional Intervention is Necessary
- Complex Issues or Lack of Experience:
However, there are times when calling a professional is a wise choice. For instance, when I faced a mysterious leak that seemed to come from nowhere, I quickly realized that I was in over my head.
In such cases, where the issue is complex, or you lack the experience or tools necessary for the job, it’s best to leave it to the professionals.
How to Choose Between DIY and Professional Repair
Determining whether to DIY or call a professional can depend on a few factors.
Consider the complexity of the issue, your level of expertise, and the potential cost.
For minor repairs or if you’re feeling handy, by all means, give DIY a shot.
But in circumstances where you’re unsure, remember my story about the elusive leak.
Sometimes, paying for a professional upfront can save you time, money, and significant stress in the long run.
Maintenance Tips
Keeping your faucet in top shape involves regular maintenance. Here are some tips based on my own experiences that can help you avoid serious issues and unneeded expenses:
Regular Checks for Leaks
When it comes to faucets, a small drip can quickly turn into a costly problem. That’s why I make it a point to check all my faucets for leaks regularly.
It’s a simple process. I look for water pooling around the base of the faucet or on the counter and listen for any telltale dripping sounds. Catching a leak early can save you a lot of money.
Monitoring Water Pressure
High water pressure might give you a great shower but can also put undue stress on your faucets and plumbing.
I learned this when I had to replace a faucet damaged by high water pressure. Now, I closely monitor my water pressure and adjust it if needed.
Proper Usage and Care of the Faucet
Using your faucet correctly and caring for it can extend its life significantly. I always ensure not to force the handles too hard when turning the water on or off.
Additionally, I clean my faucets regularly to prevent the buildup of grime and mineral deposits.
Preventing Future Leaks
To prevent future leaks, I replace the faucet’s parts as soon as they show signs of wear. It’s a bit of an investment upfront, but it can save you from dealing with more significant, pricier problems in the future.
Addressing Issues Promptly to Avoid Costly Repairs
And finally, if a problem does arise, tackle it as soon as possible. A minor issue can quickly escalate if left unaddressed. Remember that elusive leak I mentioned earlier?
I wish I had called the plumber as soon as I noticed it. It would have saved me a lot of time and stress.
Conclusion
In summation, I can’t stress enough how vital regular upkeep of your faucets is. From diligent leak detection to monitoring water pressure to proper usage and care, and finally to prompt resolution of arising issues—each of these aspects plays a pivotal role in prolonging the life of your faucet and saving your precious resources.
You might remember my anecdote about the elusive leak that gave me quite a headache. That’s a scenario you want to avoid.
So, the moment you spot something odd, like a hot water leak in your bathtub faucet, don’t hesitate. Act immediately. Swift action can make all the difference, whether it’s a DIY fix or a call to your trusted plumber.
And remember, prevention is always better than cure. Regularly maintaining your faucets might seem like a chore, especially amidst a busy schedule, but think of it this way:
A few moments spent on maintenance can save you from hours, if not days, of stress and costly repairs. So, let’s keep those faucets happy and our wallets happier!